Do Silicone Baking Mats Really Change Cookie Texture?
Do Silicone Baking Mats Change Cookie Texture? Yes, they absolutely do. The material sits directly between your dough and the hot pan.
This barrier slows down how quickly heat moves into the cookies. You get softer bottoms and slightly wider spread.
Thermal conductivity testing shows silicone transfers heat roughly one thousand times slower than bare aluminum. That delay directly impacts crust formation and butter migration during baking. Let us break down exactly how this physical barrier changes your batch and what you can adjust to fix it.
Quick Answer
Do Silicone Baking Mats Change Cookie Texture? Yes, it relies on basic heat transfer. Silicone liners block direct contact with hot aluminum.
Your dough spreads wider before the bottom sets. You get softer crusts because surface browning slows down. That thermal barrier traps more internal moisture.
How Heat Transfer Dictates Cookie Crust and Spread

Image source: Bing (Web (fair-use with source credit))
Baking relies entirely on predictable heat transfer. Metal pans conduct energy fast. Silicone mats diffuse that energy slowly.
This difference changes how your dough behaves on the rack. You are essentially adding a thin insulator to the pan.
Thermal conductivity measures how quickly heat moves through a material. Aluminum sits around two hundred watts per meter per kelvin. Food-grade silicone drops to roughly point two.
That massive gap forces the heat to take a detour. The dough touches the mat first. The mat warms up gradually.
Bottom browning requires direct and intense contact.
Slower heat delivery impacts two major reactions. The Maillard reaction creates deep flavor and crisp crusts. It starts around two hundred eighty-four degrees Fahrenheit.
Silicone delays reaching that threshold at the cookie base. Sugar caramelization follows a similar pattern. The surface temperature climbs much slower on a mat.
Butter melt plays into this delay as well. Room temperature fat hits the warm mat and liquefies instantly. The dough relaxes before the outer edges firm up.
You get a wider footprint. The center stays thicker because steam escapes slower.
Ohio State University extension research on baking science confirms that surface material directly alters spread rates. Lower thermal mass at the interface means less initial structure setting. You trade a sharp snap for a uniform chew.
That physical tradeoff drives every recipe adjustment we will cover next.
Side-by-Side: Silicone Mats vs. Parchment Paper vs. Bare Metal Pans
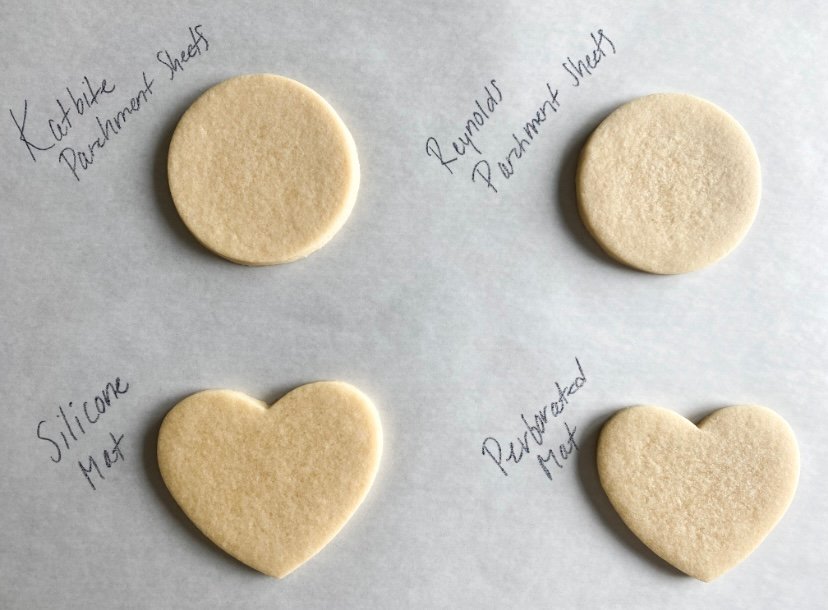
Image source: Bing (Web (fair-use with source credit))
Choosing a baking surface changes your final result. Each material interacts with heat and moisture differently. You can match the right liner to your specific dough type.
Here is how the three common options compare in practice.
| Surface Type | Heat Transfer Speed | Bottom Browning | Spread Control | Best For |
|---|---|---|---|---|
| Bare Aluminum | Very Fast | Deep, Rapid Crust | Minimal | Crisp cookies, thin lace wafers |
| Silicone Mat | Slow | Delayed, Even Pale | High | Chewy centers, delicate shapes |
| Parchment Paper | Moderate | Consistent Golden | Moderate | All-purpose batches, clean release |
Bare aluminum delivers the fastest results. Direct metal contact sears the dough immediately. The outer edge sets fast.
You get a firm crust with minimal spread. This surface works well for recipes demanding snap. Dark pans amplify this effect even further.
Silicone liners create a gentle bake. The soft fiberglass core holds heat without scorching. Your cookies relax fully before the base hardens.
Spread increases by roughly ten to fifteen percent. The bottom stays uniformly soft. You avoid burning sensitive sugar blends on thin pans.
Parchment paper offers a reliable middle ground. The paper barrier reduces sticking slightly. It does not block heat as heavily as silicone.
Browning stays consistent across standard half-sheet pans. You get predictable results without heavy temperature adjustments. That reliability makes it the standard for test kitchens.
The right choice depends on your target texture. Heavy doughs handle direct metal well. High-sugar blends burn fast on exposed pans.
You should switch surfaces based on your sugar content. Fat ratios and oven type also matter here.
Where Silicone Mats Actually Shine (And Where They Fail)
These liners excel in specific baking scenarios. They struggle equally in others. Knowing when to deploy them saves you from ruined batches.
We will look at the exact conditions that favor or hurt your cookies.
When They Win
- High butter content doughs need the gentle heat. The mat prevents scorching rich sugar mixtures.
- Drop cookies with high moisture benefit from slower evaporation. Centers stay dense and chewy.
- Hot spot prone ovens distribute heat better over silicone. You avoid localized burning on cheap aluminum trays.
- Decorative cutouts keep cleaner edges when baked on smooth liners. Grease leakage drops significantly.
When They Fail
- Thin, crisp cookie recipes turn out soft and doughy. The delayed crust formation ruins the intended snap.
- Recipes requiring heavy caramelization lose their deep color. Sugar stays pale at the base.
- Convection ovens with strong fans may blow lightweight mats. You must anchor the edges properly.
- Warped baking sheets stretch silicone unevenly. Pooled grease forms under the warped sections.
Peroxide cured silicone often carries stronger chemical odors. High sugar recipes absorb that smell during baking. Platinum cured grades stay neutral under high heat.
Always verify your mat uses the higher purity standard. The FDA food contact material guidelines outline strict migration limits for repeated use. You want liners that meet those thresholds for safety and flavor.
Quick Recipe Tweaks to Counteract the Silicone Effect
You can adapt your standard recipes without rewriting them entirely. Small adjustments compensate for the thermal lag. Apply these tweaks based on your dough composition and target finish.
Chill the Dough Before Scooping
Cold butter melts slower on the insulated mat. The dough holds its shape during the initial heat phase. You counteract the natural spread increase.
Refrigerate your dough balls for at least thirty minutes. This step matters most for high-sugar recipes.
Shift Your Oven Rack Position
Lower racks deliver stronger bottom heat from the heating element. Move your pan down one slot. Direct radiant energy overcomes the silicone barrier.
Check the cookies at the standard time. You likely need sixty to ninety seconds longer on the mat.
Increase Oven Temperature Slightly
Bumping the heat by twenty-five degrees accelerates crust setting. Do not exceed four hundred degrees Fahrenheit. High heat damages the silicone coating over time.
A modest increase pushes the Maillard reaction forward. The edges firm up faster while the center stays soft.
Rotate the Pan Halfway
Hot spots still exist under the liner. Turn your sheet one hundred eighty degrees at the halfway mark. This ensures even bottom browning.
You get consistent results across all the cookies on the tray.
Let the cookies rest on the warm mat for two minutes. Transfer them immediately to a wire rack after that. This short pause allows the structure to finalize without overbaking.
You preserve the chew while preventing sogginess.
The Most Common Texture Ruiners (And How to Avoid Them)
Baking failures usually trace back to surface preparation errors. You might blame the recipe when the pan is actually the culprit. Here are the specific mistakes that wreck cookie texture on silicone.
Overcrowding the Pan
Dough balls merge when spaced too closely. The trapped steam softens the bottom edges completely. Leave at least two inches of clearance between each scoop.
You need room for the extra spread the mat encourages.
Greasing the Silicone Surface
Never add butter spray or oil to the liner. The fat creates a slippery pool that accelerates spreading. Your cookies will flatten into thin discs.
The non-stick coating works perfectly without extra lubrication.
Baking on Warped Sheets
Bent pans create uneven contact with the mat. Air gaps form under the silicone. Heat distribution becomes patchy.
Use flat, heavy gauge aluminum trays for consistent results.
Using High Heat Settings
Pushing past four hundred fifty degrees damages the coating. Scorched sugar bonds to the degraded surface. Cleanup becomes impossible and flavor turns bitter.
Stick to standard three hundred fifty to three hundred seventy-five degree ranges.
Skipping the Preheat Cycle
Cold ovens delay the entire baking process. The dough sits too long before setting. You get uneven textures and pale bottoms.
Always let your oven reach target temperature for at least fifteen minutes.
Food-Grade Silicone Standards You Should Actually Trust
Not all baking mats use the same manufacturing process. Cheap knockoffs often contain fillers that melt or off-gas under heat. You need verified materials for repeated kitchen use.
Platinum cure silicone represents the industry gold standard. The curing process uses a platinum catalyst instead of peroxides. This method leaves zero chemical byproducts behind.
Your cookies taste exactly as intended. You avoid that rubbery odor that plagues budget brands.
Look for FDA compliance on the product packaging. The Code of Federal Regulations sets strict migration limits for repeated food contact. Legitimate manufacturers list their testing certifications clearly.
Per LFGB European testing standards, these mats must pass heavy metal extraction tests. Verify these claims before buying.
Fiberglass mesh reinforcement matters for durability. The grid structure prevents stretching and tearing. Lower quality mats use thin silicone layers that crack over time.
You want a product rated for at least three thousand bake cycles. Replacement costs add up quickly when liners fail.
Storage habits affect lifespan significantly. Roll the mat gently after cleaning. Never fold sharp creases into the silicone.
Cracks trap moisture and promote bacterial growth. Flat storage in a dry drawer preserves the non-stick surface. As of 2026, top-tier manufacturers include replacement warranties for verified commercial buyers.
You should expect similar durability for home use.
Quick Decision Guide: Pick Your Baking Surface by Cookie Style
Match your liner to the dough structure. Texture goals dictate surface selection. Use this straightforward flow to choose the right tool.
| Cookie Type | Target Texture | Recommended Surface | Why It Works |
|---|---|---|---|
| Chocolate Chip Chewy | Soft center, slight edge crisp | Silicone Mat | Gentle heat preserves moisture |
| Shortbread | Crisp bottom, clean release | Bare Aluminum | Direct heat firms butter quickly |
| Sugar Cookie Cutouts | Sharp edges, even base | Silicone or Parchment | Prevents spreading, keeps shape |
| Lace Tuiles | Paper thin, rapid set | Bare Metal (light pan) | Fast heat transfer creates delicate crispness |
| Oatmeal Raisin | Dense, uniform chew | Silicone Mat | Slower bake hydrates oats evenly |
If you want a crisp snap, go bare metal. Direct contact sears the dough instantly. You get the classic bakery crunch.
If you chase chewy centers, switch to silicone. The insulated surface keeps steam trapped longer. Fat migration stays controlled.
Your cookies stay thick and tender.
If you need reliable all-purpose results, stick with parchment. The paper barrier offers balanced heat transfer. Cleanup stays fast without heavy adjustments.
Swap your surface based on the recipe. Do not force a single liner for every batch. Adjust your rack position accordingly.
You will see immediate texture improvements.
Frequently Asked Questions
Do silicone baking mats make cookies spread more?
Yes, the insulated surface delays bottom setting. Dough relaxes longer before the crust firms. You typically see ten to fifteen percent extra spread.
Chill your dough or lower the rack to compensate.
Can I use silicone mats for crispy cookies?
You can, but the texture will lean softer. Direct metal heat creates crisp bottoms faster. Bake on a bare light aluminum sheet if you want snap.
Switch to a mat only for chewy or delicate recipes.
How long do silicone baking mats actually last?
High-quality platinum cured liners last around three thousand uses. Thick fiberglass reinforcement prevents cracking and tearing. Store them flat to avoid permanent creases.
Replace the mat if the surface turns sticky or dull.
Do I need to grease a silicone baking mat?
Absolutely not. The non-stick surface releases dough without extra fat. Adding butter or spray actually increases spreading.
Grease creates a slippery layer that ruins shape control. Keep the mat dry and clean for best results.
Why do my cookies taste different on silicone mats?
The material does not absorb flavors or oils. Bare pans can leave metallic or greasy residues. Silicone keeps the flavor profile pure.
If you taste rubber, your mat likely uses cheap peroxide curing. Upgrade to a platinum cured liner.
Match your liner to your recipe goals. Follow the timing and spacing adjustments we covered. Your next batch will come out exactly how you want it.
That covers the essentials. Grab your dough, adjust your rack, and bake with confidence.
Stick to the adjusted timing and let the surface do its job. Your next trays will turn out perfectly.
Proper Cleaning and Long-Term Care
Residual oils ruin non-stick surfaces over time. Warm water and mild dish soap handle most baking debris. Scrub gently with a soft sponge or non-abrasive cloth.
Harsh pads damage the fiberglass mesh underneath.
Stubborn sugar spots require a brief soak. Fill a sink with warm water and a drop of baking soda. Let the liner rest for twenty minutes.
The residue lifts away easily without scraping.
Air drying prevents moisture traps. Lay the mat flat on a clean rack or countertop. Folding wet silicone creates creases that hold bacteria.
Proper storage extends the usable life significantly.
Dishwasher cycles cause uneven thermal stress. The intense heat and harsh detergents degrade platinum coatings. Hand washing preserves the release quality for years.
You save money by avoiding early replacements.
Convection Oven Adjustments
Forced air changes heat distribution patterns dramatically. Fans circulate hot air faster around the insulated liner. You need to drop the temperature by twenty-five degrees.
Lower heat compensates for accelerated surface cooking.
Silicone mats react strongly to direct airflow. Lightweight edges can flutter during high fan speeds. Weigh the corners down with heavy metal rims.
This keeps the surface flat against the pan.
Check your cookies five minutes early. Convection bakes roughly twenty percent faster on any surface. The delayed browning effect still applies here.
Watch the edges turn golden instead of relying on a fixed timer.
Rotate your tray halfway through the cycle. Hot spots still develop under the fiberglass grid. Even airflow cannot fix a warped baking sheet.
Turn the pan one hundred eighty degrees for uniform results.
Dough Hydration and Sugar Impact
Liquid content changes how heat penetrates the dough. Wet batters spread further before the crust sets. Silicone amplifies this spread due to low thermal conductivity.
Reduce liquid by one tablespoon per cup of flour.
Sugar type dictates caramelization speed on the liner. White sugar browns quickly and creates crisp edges. Brown sugar holds moisture and keeps centers soft.
Adjust your blend based on your target texture.
Leavening agents expand faster on warm surfaces. Baking soda reacts instantly with acidic ingredients. The mat traps gas bubbles longer during the bake.
Reduce soda by one quarter teaspoon to prevent collapse.
Egg temperature alters fat emulsion stability. Cold eggs keep butter chunks solid longer during mixing. Room temperature eggs spread faster on the insulated surface.
Match your egg prep to your desired chew level.
Signs Your Mat Needs Replacing
Surface stickiness signals coating degradation. Fresh dough leaves behind greasy residue instead of releasing cleanly. This happens when the silicone breaks down from repeated high heat.
Replacement restores your bake quality immediately.
Visible cracks compromise heat diffusion entirely. Exposed fiberglass creates uneven hot spots on the tray. Cookies burn directly over the damaged areas.
Discard the liner before it ruins another batch.
Warped shapes prevent proper pan contact. Bent mats pool grease and alter cookie diameters. Flat liners distribute thermal energy evenly.
A warped piece is no longer safe for consistent baking.
Yellow discoloration indicates thermal breakdown. Prolonged exposure above four hundred fifty degrees alters the chemical structure. Faded mats lose their non-stick properties rapidly.
Track your bake count and retire old liners proactively.
Final Verdict: When to Switch Your Surface
Match the liner to your recipe structure. Heavy butter doughs thrive on the gentle thermal barrier. Thin, crisp recipes demand direct aluminum contact.
You cannot force one surface to handle every cookie style.
Track your spread and adjust timing accordingly. Silicone requires longer bakes and cooler racks for optimal results. Parchment paper offers reliable middle ground for mixed batches.
Choose based on your desired finish.
Your oven and pan gauge dictate the final outcome. Thick trays hold heat longer than thin disposable ones. Combine proper equipment with the right liner.
You get consistent texture every single time.
Start with chilled dough on a preheated pan. Monitor the bottom color after twelve minutes. Adjust your next batch by thirty second increments.
Precision wins over guesswork in the long run.
Track your results across three batches. Note the exact rack position and bake time that produces your preferred crust. Consistent cookies come from small adjustments.
You will dial in the perfect finish quickly. Save those notes. Your next batch will match your expectations every time.
Keep your baking sheets flat, your dough chilled, and your mats clean. That simple routine guarantees perfect cookies every single time.
Silicone liners just shift the math. Track your bake time. Trust your oven's hot spots.
Your next batch will match your recipe perfectly.
Respect the thermal delay. Adjust your spacing. The mat handles the rest once you dial in your timing.
Your cookies will turn out exactly right.
Your oven is ready. Pull the first tray when the edges set.
Let them rest on the pan for two minutes. The residual heat finishes the base. Move them to a cooling rack once firm.
You will notice the improved chew immediately.
That final cooling step locks in the texture you worked for. You now know exactly how the liner changes the bake. Keep tweaking your timing until every batch matches your standards.
Your mats become a reliable tool once you adjust for the heat lag. Treat them as a thermal buffer rather than a direct substitute. Your cookies will consistently hit the right chew and spread.
Track your results for a few batches. Note the rack position and exact timing that gives you the best bottom color. Small tweaks make all the difference.
You will master the surface quickly.
Stick to the adjustments we covered. Keep your dough cold and your pans flat. The mats will deliver exactly what you expect.
Happy baking.