How to Test an Air Fryer Microswitch (Dual Basket Guide)
Dual basket air fryers rely on safety interlocks to detect when each drawer is fully pushed in. When a unit fails to start or throws a basket error code, knowing how to test if dual basket air fryer drawer microswitch is broken can save you from buying a replacement appliance.
These small electronic parts control power flow to independent heating zones. Per UL safety standards for kitchen appliances, these interlocks prevent the heating elements from activating unless the basket housing is properly aligned.
Quick Answer
To test a dual basket air fryer microswitch, first unplug the appliance completely. Access the internal housing to expose the switch terminals. Set a digital multimeter to continuity mode.
Press the switch actuator button while holding the meter probes to the terminals. A working switch beeps and shows zero ohms. A broken switch shows infinite resistance or stays silent.
Why Your Dual Basket Air Fryer Drawer Won't Start
Modern dual zone appliances use independent logic circuits for each cooking zone. If the left screen works fine, but the right basket refuses to power up, the problem usually points to a mechanical sensing failure.
Manufacturer troubleshooting guides from brands like Ninja and Instant Pot indicate that basket detection errors stem from stuck or worn interlock switches. Over time, constant sliding friction wears down the plastic actuator arm. When the arm fails to click the internal button, the control board assumes the drawer is open.
What a Microswitch Actually Does And Why It Fails
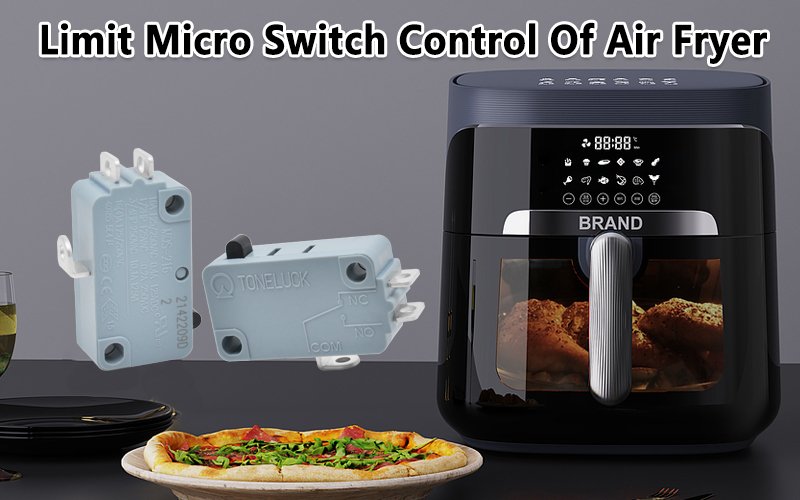
A microswitch is a snap-action electrical component that acts as a gatekeeper for circuit power. Inside your appliance, it functions as a safety interlock. When you slide the basket home, the drawer chassis physically pushes a tiny spring-loaded plunger.
This action closes the circuit and tells the main control board that it is safe to send high voltage to the heating element.
Aggregate repair data highlights three common failure points for these components over their operational lifespan.
- Physical wear on the plastic push button or alignment tab.
- Internal metal leaf spring fatigue preventing proper contact closure.
- Grease accumulation and carbon fouling blocking electrical conductivity.
Tools You Need Before Opening Up Your Air Fryer
Before you start testing hardware components, gather the right diagnostic tools. Working inside tight appliance housings requires precision equipment to avoid damaging delicate wiring harnesses.
| Tool or Material | Primary Purpose | Safety or Usage Notes |
|---|---|---|
| Digital Multimeter | Measuring electrical continuity across switch contacts | Set to the audible beep or ohms setting before testing. |
| Precision Screwdriver Set | Removing outer casing screws (Phillips and Torx) | Keep screws organized by size during teardown. |
| Plastic Pry Tool | Unlacking snap-fit plastic housing seams | Prevents cracking the outer plastic shell. |
| Needle-Nose Pliers | Gently pulling spade wire terminals off the switch | Pull by the metal connector, never by the thin wire. |
Safety First Discharging and Unplugging
Countertop kitchen appliances store hazardous electrical charges in internal capacitors long after you pull the power plug. Per NFPA electrical safety guidelines, always disconnect the power cord from the wall outlet before removing any exterior panels.
Never test continuity on a live circuit. Connecting a multimeter set to resistance mode on a live board will fry your meter instantly. Give the appliance ten minutes to discharge internal power supplies before touching any internal wiring harnesses.
Locating the Microswitch Inside the Basket Housing
Finding the faulty switch requires removing the outer plastic shroud of the dual basket air fryer. Once you pull the exterior screws, slide off the main housing to reveal the inner skeleton.
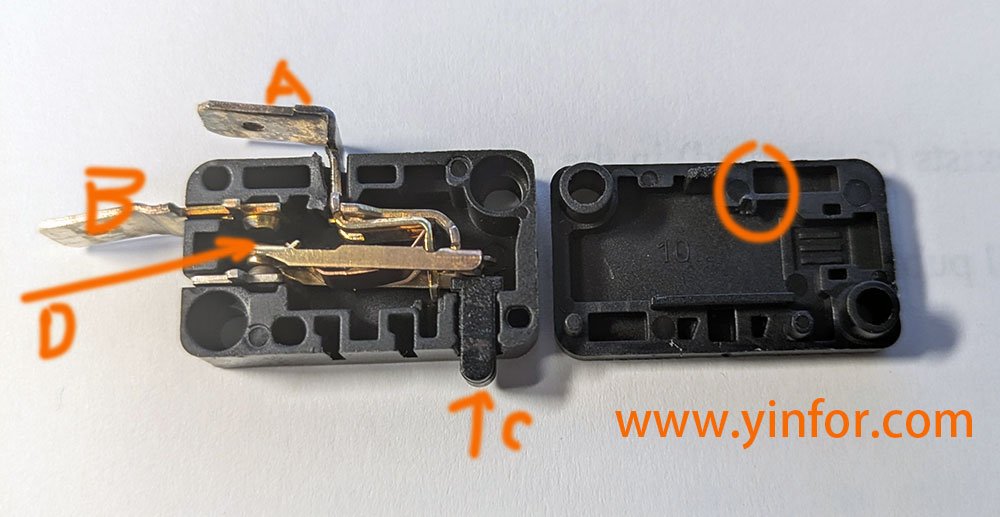
Look directly behind the plastic tracks where the cooking drawers slide in. Each drawer typically has a dedicated sensor mounted near the rear wall. You will spot a small rectangular black housing with two or three thin wires attached via spade connectors.
Step-by-Step Multimeter Test for Dual Air Fryer Microswitches
Testing the component requires isolating the switch from the appliance wiring. Pull the spade connectors off the switch terminals using your needle-nose pliers. Pull straight back to avoid bending the metal prongs.
Set your digital multimeter dial to the continuity setting, which looks like a tiny sound wave or diode symbol. Touch the two meter probes together to verify the screen beeps and reads zero. This confirms your meter is working properly.
Place one meter probe on the common terminal and the other on the normally open terminal. Press the small plastic plunger down with your finger or a non-conductive tool. Listen for the physical click of the internal leaf spring snapping into position.
Reading Your Multimeter: Continuity vs. Open Circuit
A healthy microswitch changes its electrical state instantly the moment you depress the button. When you push the plunger down, a working switch shows a reading of zero ohms on your screen. You will also hear a continuous audible beep from the meter.
If the screen stays silent and reads "OL" (over limit or infinity) while you hold the button down, the internal contacts are fouled or broken. This means current cannot flow through the switch. A switch that shows continuity without pressing the button is stuck closed, which is another common failure mode.
- Working Switch: Reads 0 ohms and beeps only when the button is depressed.
- Open Failure: Reads OL or infinity even when the button is fully pressed down.
- Closed Failure: Reads 0 ohms constantly whether you touch the button or not.
Common Visual Clues: Snapped Tabs and Grease Buildup
Physical inspection often reveals the problem before you even touch a multimeter. Look closely at the plastic lever or alignment tab attached to the switch housing. Constant slamming of heavy cooking drawers frequently snaps these tiny plastic arms clean off.
Kitchen grease and food vapor also work their way past the rubber seals into the switch body. This residue hardens over time and creates an insulating layer over the internal metal contacts. If you see sticky residue or carbon scorching around the terminal pins, the switch needs immediate replacement.
Microswitch Replacement vs. Buying a New Air Fryer
Replacing a broken interlock switch costs very little compared to buying an entirely new countertop appliance. Universal microswitches cost just a few dollars online, making this a cost-effective repair for DIY enthusiasts.
If your dual zone air fryer is out of warranty, a fifty-cent component swap saves you over a hundred dollars in replacement costs. However, if the main control board is fried or the heating elements have burned out, replacing just the sensor will not solve your problem.
- Best for Microswitch Replacement: The appliance has power, but one drawer refuses to start due to a sensor error.
- Best for Buying a New Unit: Multiple electrical faults, failing control panels, or damaged heating assemblies.
Mistakes to Avoid When Testing Appliance Interlocks
Skipping basic safety steps leads to damaged tools or ruined appliances. Never plug the air fryer back into the wall while your multimeter probes are attached to the switch terminals. This mistake will instantly destroy your multimeter and trip your home breaker.
Another common error is yanking the wires instead of the plastic connector housing. The internal wires connected to these switches are thin and prone to snapping right at the crimp. Take your time, work methodically, and always disconnect the power source before starting any diagnostic checks.
FAQs About Dual Air Fryer Drawer Sensors
What error code means the air fryer microswitch is broken?
Most dual zone appliances display flashing dashes or specific error codes like E1 or Open when a drawer sensor fails. The control panel cannot detect that the basket is fully inserted. This stops power from reaching the heating element in that specific zone.
Can I bypass a broken air fryer microswitch with a wire jumper?
Bypassing safety interlock switches with a jumper wire is extremely dangerous and creates a major fire hazard. These switches prevent high-voltage power from activating heating elements while the drawer is open. Always replace a faulty switch with an identical rated component instead of bypassing it.
Where can I buy a replacement microswitch for my air fryer?
Replacement microswitches are widely available through online appliance parts suppliers and electronics distributors. Check the physical dimensions and electrical rating printed on the side of your original switch before ordering. Matching the amp rating ensures safe, reliable operation.
Do both drawers use the same microswitch model?
Most dual basket models use identical switches for both the left and right drawer tracks. You can easily swap the left and right switches temporarily to verify if a suspect component is truly dead. If the fault moves to the other side with the switch, you have confirmed the component failure.