Cherry Pitter Spring Broke? Easy Fixes
A Cherry Pitter Spring Broke problem usually means the return spring has snapped, slipped, or lost tension. The handle may feel dead. The plunger may not pop back.
Cherries can jam because the pit chute no longer clears.
Most basic manual cherry pitters cost about $10 to $25 as of 2026. That makes repair or replacement a practical decision, not an emotional one. It also explains why a missing $2 spring can stop a $20 tool.
The right next step depends on what the spring actually did.
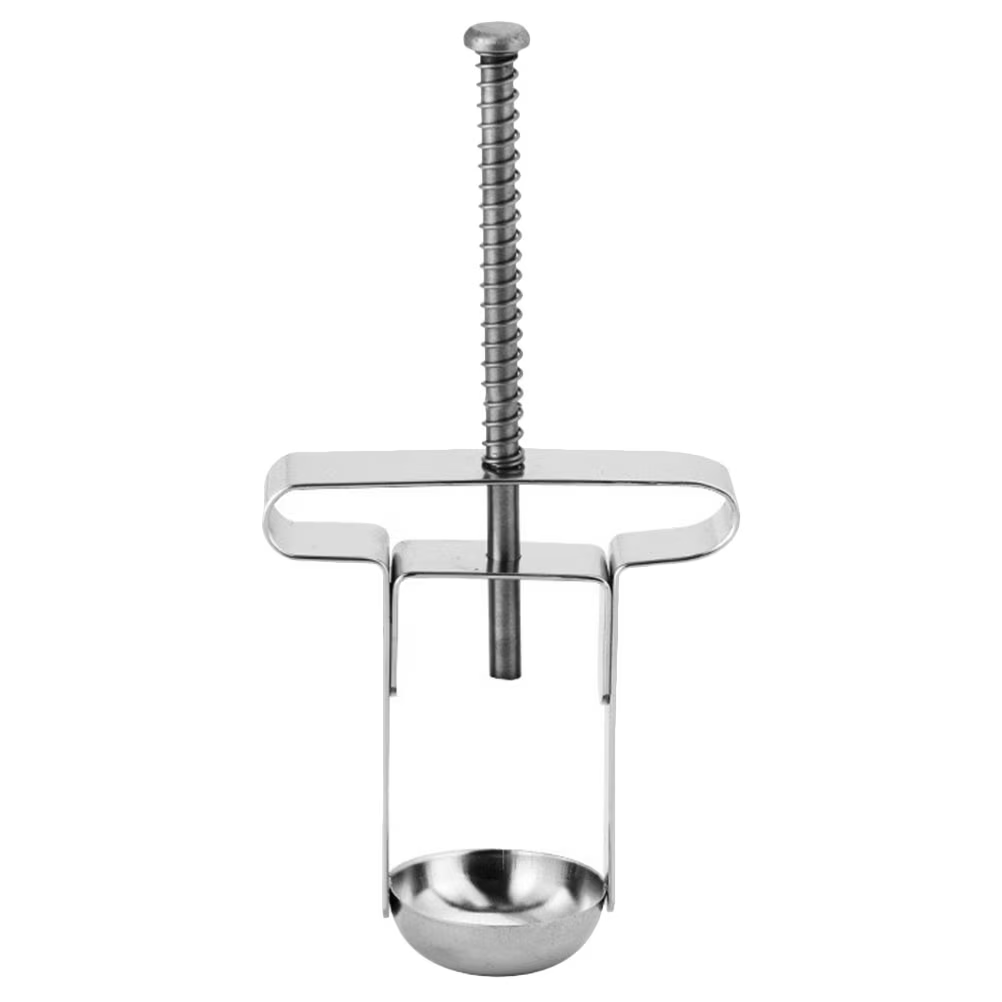
Image source: Bing (Web (fair-use with source credit))
Quick Answer
A Cherry Pitter Spring Broke repair starts with safe diagnosis. First check whether the steel coil snapped. Then look for an unhooked spring end.
If only the spring failed, replace that part. If housing anchors cracked, usually buy another pitter.
Why a Cherry Pitter Spring Breaks and What It Usually Means
Small kitchen tools take repeated shock loads. A cherry pitter spring compresses and releases many times per minute during a big batch. Over time, metal fatigue can start at the hook or loop.
That is where stress concentrates.
Manufacturer specifications indicate most manual pitters use a small steel return spring. It may be an extension spring, compression spring, or torsion spring. The exact type depends on the body design.
Aggregate reviews report three common failure patterns.
- The spring snaps at one end.
- The spring stretches and loses tension.
- The spring pops off an anchor point.
A snapped spring needs replacement. A stretched spring also needs replacement. A spring that only came loose may be reusable.
That distinction saves money. It also prevents buying the wrong part.
Corrosion is another common cause. Cherry juice is acidic. If the tool stays wet, rust can weaken the coil.
Rust can also stain the fruit path. That matters for food safety and cleanup.
Overload also shows up in real use. Pitting very firm cherries, frozen fruit, or fruit with large pits can spike the force needed. That extra force transfers to the spring hooks.
If the hooks are already weak, they can open or snap.
Dishwasher exposure can speed corrosion. Many pitters use carbon steel springs. Carbon steel holds strength well.
It rusts more easily than stainless steel. Dried cherry sugar also traps moisture.
Quick Diagnosis: Broken, Unseated, or Just Stretched?
The fastest way to diagnose the fault is to separate the spring issue from the housing issue. Look at the coil first. Then test the plunger by hand.
Do not force anything.
Use this table to sort the symptom.
| Symptom | Likely cause | Best next move |
|---|---|---|
| Handle has no resistance | Spring detached or broken | Open the housing and inspect |
| Spring visible but loose | Spring stretched or unhooked | Rehook or replace the coil |
| Sharp coil fragment missing | Spring snapped | Remove pieces and replace |
| Plunger binds | Misaligned spring or worn pin | Check alignment before repair |
| Plastic post cracked | Anchor failure | Replace the whole pitter |
If the spring is merely unhooked, the repair can take only a few minutes. If the spring is snapped, you need a matched replacement. If the plastic anchor is cracked, a new spring will not fix the tool safely.
Here is a simple if/then path.
- If both hooks are intact, reseat the spring.
- If one hook broke, replace the spring.
- If the coil looks longer than normal, replace it.
- If rust is heavy, replace the spring and clean the housing.
- If the housing is cracked, retire the pitter.
Save the old spring. It is your pattern. Even a broken spring can show hook shape and coil size.
If the spring is missing, look for wear marks on the anchor posts. Those marks can tell you how the spring sat.
This is the branch that generic advice misses. Many people assume the whole tool is dead. In many cases, the fault is only a displaced spring.
How the Spring-Return System Works Inside a Cherry Pitter
A manual cherry pitter works like a small press. The fruit sits in a holder. You squeeze the handle.
A plunger pushes the pit out through the flesh. The return spring pulls the plunger back.
The return spring is the small coil that restores the tool after each stroke. The main parts are simple.
- Fruit holder or cup
- Plunger or piston
- Pit chute or exit slot
- Hinge pin
- Return spring
- Locking latch on some models
The spring stores energy during the squeeze. When you release the handle, that energy returns the plunger. If that energy path breaks, the tool stops cycling cleanly.
Most handheld models use an extension spring. It stretches between two anchor points. Countertop lever models may use a compression spring.
A compression spring sits around a shaft and pushes parts apart. Some hinges use a torsion spring. That type twists around a pin.
Spring rate matters. Spring rate is the amount of force needed to compress or extend the spring a set distance. Too light and the plunger lags.
Too stiff and the handle feels harsh.
This matters for replacement. You cannot swap spring types without checking space and force. A stronger spring can feel better at first.
It can also crack plastic posts or make the handle hard to close. A weaker spring may fail to eject pits.
A diagram would usually show the spring seated between two posts. In real tools, that space is tight. Small changes in length or hook angle can cause binding.
Inspect the Pitter Before You Try to Fix It
Before ordering parts, inspect the whole assembly. Work on a clean towel. Small springs can jump.
Broken ends can cut.
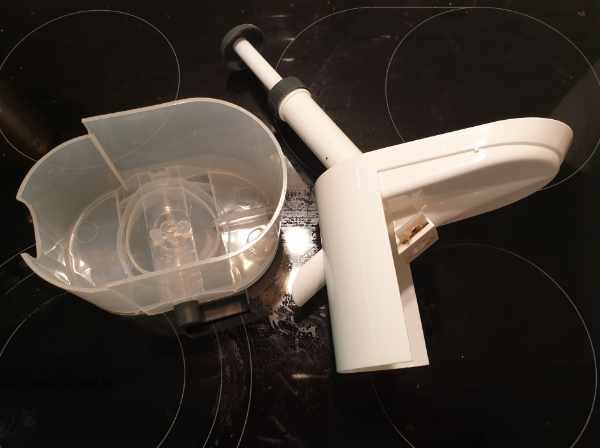
Image source: Bing (Web (fair-use with source credit))
The U.S. Consumer Product Safety Commission advises care with sharp household tool parts. That advice fits here.
Wear eye protection if the spring is under tension. Keep fingers away from the plunger path.
Check the Spring, Hinge Pin, Plunger, and Housing
Start with the spring. Look for a clean break. Look for rust.
Look for a hook that opened up.
Then check the hinge pin. A bent pin can make the plunger rub. That rubbing can overload the spring.
If the pin is loose, the tool may feel sloppy.
Next check the plunger path. Press it by hand. It should move straight.
It should not scrape. If it sticks, clean dried juice first. Cherry residue can harden like glue.
Finally check the housing. Look at the spring anchor posts. Look for hairline cracks.
Look for white stress marks in plastic. If the anchor post is cracked, the repair is not reliable.
Use this checklist.
- Spring ends intact
- No rust flakes in the fruit zone
- Hinge pin straight and seated
- Plunger moves freely
- Anchor posts solid
- No metal fragments left inside
Wash removable parts in warm soapy water. Dry them fully before assembly. Do not leave steel springs soaking.
If the tool is used for canning or market sales, be stricter. Replace questionable parts.
If everything passes except the spring, repair is reasonable. If the fruit zone has rust, clean it fully. If rust cannot be removed, replace the tool.
For any lubricant near food zones, use materials consistent with U.S. Food and Drug Administration food-contact guidance.
Decide Whether to Repair, Replace, or Retire the Pitter
The decision comes down to three things. The spring condition, the housing condition, and the cost of parts. A repair makes sense when the body is solid.
A replacement makes sense when the frame cannot hold a new spring safely.
As a practical rule, stop spending money when parts and shipping approach half the price of a comparable new pitter. Many basic models sell for about $10 to $25. Premium metal models can cost more.
If a replacement spring costs $8 and shipping costs $6, a $20 tool may not be worth fixing.
| Situation | Best choice | Why |
|---|---|---|
| Spring unhooked only | Repair | Fast and usually free |
| Spring snapped, housing solid | Replace spring | Restores normal function |
| Spring weak, heavy use | Upgrade spring or tool | Better durability |
| Cracked anchor post | Replace pitter | New spring may fail unsafe |
| Proprietary part unavailable | Replace pitter | Repair becomes guesswork |
Repair If the Spring Is the Only Problem
Repair is the right call when the failure is isolated. That means the spring broke, but the anchors are fine. It also means the plunger still moves straight.
Choose repair if these are true.
- The old spring can be measured.
- The anchor points are not cracked.
- The body closes square.
- Replacement spring dimensions match closely.
- The tool is a higher quality model.
A good repair restores ejection force. It also keeps a trusted tool in service during cherry season. This matters when shipping times are slow.
Replace the Tool If the Housing or Anchors Are Damaged
Replace the pitter if the failure is structural. Cracked plastic is the big warning sign. A new spring can pull a cracked post apart.
That can send sharp pieces outward.
Replace the tool if you see these signs.
- Cracked spring anchor
- Bent hinge boss
- Stripped screw hole
- Heavy rust in the fruit path
- Missing proprietary parts
- Repair cost near half of a new unit
If the pitter is cheap and the spring is proprietary, replacement is often faster. If the pitter is metal and well made, contact the manufacturer first. Some brands sell spare parts.
Some do not. That changes the whole decision.
For high volume use, reliability matters more than part cost. A small failure during a large canning session can waste time and fruit. If you process cherries often, choose the option that gives you a stable tool, not just a cheap fix.
How to Remove the Broken Spring Safely
Start by relieving stored tension. Do not pull the handle apart while the spring is loaded. Work over a towel or tray so small parts do not bounce away.
Wear safety glasses. Broken spring ends can be sharp. They can also flick out when the housing opens.
Use this order.
- Close the handle if possible.
- Remove any screw, latch, or hinge pin.
- Support both halves before the last pin comes out.
- Lift the spring away with pliers if the ends are sharp.
- Place fragments in a small container.
If the spring is still hooked on one side, release the free end first. Then slide the hooked end off the anchor post. If the post is tight, use a flat tool to lift the loop.
Do not pry against plastic unless you must. Prying can crack the anchor.
If a fragment falls inside the plunger channel, remove it first. A hidden piece can jam the plunger later. It can also scratch the fruit path.
How to Measure the Old Spring for a Correct Replacement
Measure the old spring before buying anything. A close match can still fail if the hook angle is wrong. Write down each value in millimeters and inches if you can.
Use digital calipers if available. A ruler works for length. Wire diameter needs calipers.
Spring suppliers list sizes by precise dimensions, so guessing rarely works.
Free Length, Wire Diameter, Outside Diameter, and Hook Size
Free length is the spring length with no load. Measure it end to end, excluding hooks if the supplier says so. If the spring is broken, measure the longest usable piece and note the missing section.
Wire diameter is the thickness of the spring wire. This has a big effect on strength. Outside diameter is the width across the outer coils.
Hook size includes loop length, loop opening, and hook angle.
| Measurement | What it tells you | Why it matters |
|---|---|---|
| Free length | Resting spring length | Fit inside the housing |
| Wire diameter | Wire thickness | Force and durability |
| Outside diameter | Coil width | Clearance around posts |
| Hook size | End attachment size | Secure anchor fit |
If the old spring is stretched, free length may be longer than original. That is still useful. Compare it to the housing depth.
Too much length can preload the spring. Too little can fail to return the plunger.
Finding the Right Replacement Spring
The best replacement is the exact spare part from the manufacturer. That keeps force, fit, and hook shape correct. Manufacturer specs confirm small changes can affect pit ejection.
If no OEM part exists, use a matched hardware spring. Match spring type first. Then match dimensions.
Finally match material.
OEM Parts vs Universal Hardware Springs
OEM parts are safest for premium or newer models. They usually need no modification. They may take longer to arrive.
They can also cost more than the tool is worth.
Universal springs are useful for older or discontinued pitters. They are widely available from small hardware suppliers. The risk is fit.
You may need to adjust hook length or bend a loop slightly.
Use this branch.
- If the brand sells the part, buy OEM.
- If the tool is metal and expensive, OEM is usually worth it.
- If the tool is cheap and old, a universal spring can make sense.
- If no spring matches within a close size, replace the pitter.
Choose stainless steel if rust was part of the problem. Carbon steel can work well. It needs better drying.
Avoid springs with rough ends or sharp burrs.
Step-by-Step Spring Replacement Workflow
Once the correct spring arrives, do a dry fit. Set the parts on a clean towel. Confirm the new spring matches the old one.
Then follow this sequence.
- Clean the housing and plunger channel.
- Dry all parts fully.
- Check anchor posts for cracks again.
- Seat the first hook or loop on the fixed anchor.
- Compress or extend the spring to the second anchor.
- Confirm the coils sit straight.
- Reinstall the hinge pin or body screws.
- Cycle the handle slowly by hand.
If the handle resists early, stop. The spring may be twisted. It may also be too long or too stiff.
Back it out and check alignment.
After assembly, test with three or four cherries. Watch the pit chute. The plunger should return fully each time.
The pit should eject without pushing with a finger.
If ejection is weak, the spring may be too light. It may also be installed backward. If the handle feels harsh, the spring may be too strong.
In a plastic body, too much force is risky.
Mistakes That Make Cherry Pitter Repairs Fail
The biggest mistake is replacing the spring without checking the housing. A new spring can break a weak anchor. That turns a small repair into a dead tool.
Another common error is choosing a stronger spring to make the tool feel better. This can overload the hinge. It can also make one-handed use harder.
Avoid these problems.
- Buying by coil size alone
- Ignoring hook orientation
- Using rusty parts
- Forcing the housing closed
- Losing the original spring pattern
- Skipping a slow hand test
- Leaving sugar residue in the channel
Do not bend a spring loop while it is under load. That can cause a sudden snap. Do not use glue on cracked plastic anchors.
Glue will not handle repeated shock.
If the repair fails twice, the design may be underbuilt. Sometimes the tool is too light for heavy canning. In that case, a stronger countertop pitter may save time and fruit.
When a Repair Is Not Worth the Cost
Stop if the frame is damaged. A cracked anchor post can fail under spring load. That can send sharp pieces outward.
Also stop if the part is hard to source. If shipping pushes repair near half the cost of a new pitter, replacement usually wins.
Safety Warnings for Sharp Springs, Pinch Points, and Food-Contact Parts
Wear eye protection. Broken spring ends can cut skin. Keep fingers away from the plunger path while the housing is open.
Do not use the tool if rust remains in the fruit path. Use food-grade lubricant near fruit zones. Dispose of spring fragments safely.
Maintenance Tips to Keep the New Spring From Failing
Rinse the pitter soon after use. Cherry juice and sugar speed corrosion. Dry the spring area fully before storage.
Check the hooks after heavy batches. Lightly oil metal points only if the maker allows it. Store the handle unlocked, not squeezed shut.
Quick Decision Guide: Repair It, Replace It, or Use a Backup Method
| Condition | Best move |
|---|---|
| Spring unhooked | Reseat it |
| Spring snapped, body solid | Replace spring |
| Anchor cracked | Replace pitter |
| Part unavailable | Replace pitter |
If you need pitted fruit today, use a paring knife as a backup. It is slower, but safe and simple.
Frequently Asked Questions
Can you fix a cherry pitter spring with a hardware store spring?
Yes, if the size and hook shape match closely. Measure free length, outside diameter, wire diameter, and hook size. A spring that is too stiff can crack plastic anchors.
A weak spring may fail to eject pits cleanly during use.
Is a broken cherry pitter spring dangerous?
It can be. Broken coil ends are sharp and may fly loose during disassembly. Wear eye protection, keep fingers clear, and discard fragments safely.
Do not keep using a pitter with cracked plastic parts near the spring area before repair.
How much does a replacement cherry pitter spring cost?
Small springs often cost about $4 to $15. OEM parts can cost more, especially with shipping. If total repair nears half the price of a comparable new pitter, replacement usually makes more sense for many home cooks in peak season.
When should you replace the whole cherry pitter instead?
Replace it when the housing, hinge, or anchor post is damaged. Also replace it if the spring is proprietary and unavailable. A cracked body cannot safely hold repeated spring tension, even with a new coil.
This matters during large canning sessions.