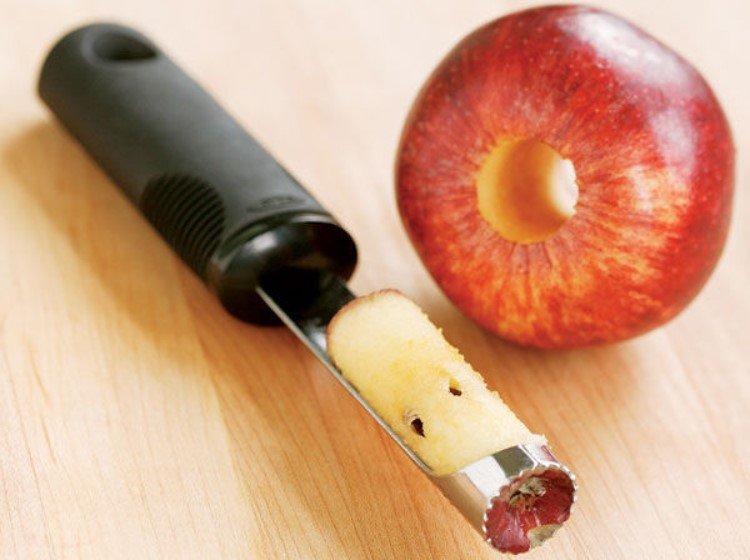
Small Cherries Don’t Fit? Causes and Easy Fixes
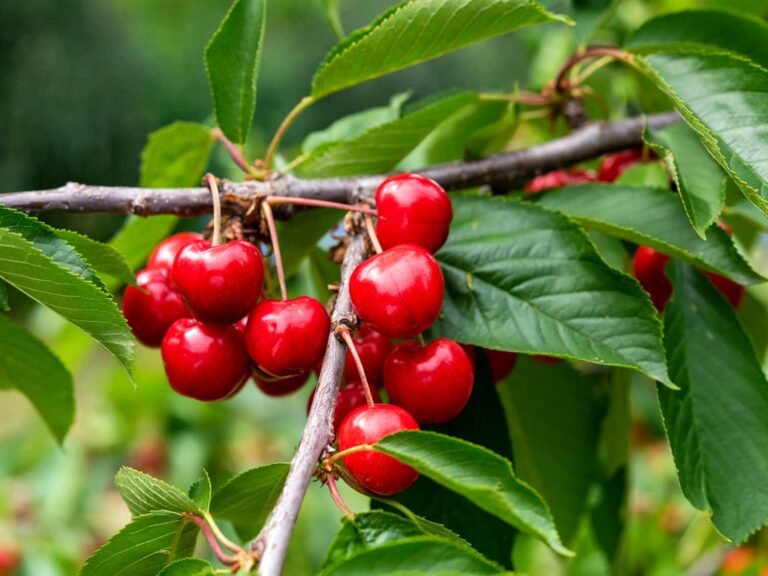
Small Cherries Don't Fit when the fruit is smaller than the tool expects. The cherry shifts, slips, or crushes instead of feeding cleanly. The pit stays put, and the finished fruit looks torn.
That turns a quick prep job into a frustrating batch rescue.
Most manual cherry pitters assume sweet cherries around 18 to 26 mm across. Sour cherries often measure only 12 to 18 mm. That size gap changes the whole workflow.
It explains why the tool fails in predictable ways.
Small Cherries Don’t Fit? Causes and Easy Fixes

Image source: Bing (Web (fair-use with source credit))
Quick Answer
Small Cherries Don't Fit because fruit diameter is too small. Most pitters work best above 16 mm diameter. Measure the batch before you choose a method.
Sort undersized cherries into cooking or pressing uses. Use adjustable guides or a smaller coring tool.
Why Small Cherries Create Fit Problems
A cherry pitter is a simple machine, but it depends on placement. The fruit must sit centered under the plunger. The pit must line up with the ejector path.
When the cherry is too small, none of that happens reliably.
Most pitters have three working parts. The guide funnel holds the cherry. The plunger pushes the pit downward.
The pit channel gives the pit a path out.
If one part is sized for large fruit, the whole system drifts. The cherry may enter the tool fine. It can still tilt at the moment of pressure.
That is when the pit escapes the coring path.
Small fruit moves. It tilts in the guide. It drops too low.
It can also spin when the plunger hits.
That creates three common failures.
- The plunger misses the pit and pushes flesh aside.
- The cherry slips through without being cored.
- The fruit crushes because it is not supported.
In our research, the complaint is rarely about sharpness. It is almost always about clearance. A tool made for a 20 mm sweet cherry has extra room.
A 13 mm sour cherry can tilt inside it.
As of 2026, many manual pitters still follow that larger fruit assumption. That creates trouble for sour cherry regions. It also affects backyard trees with mixed fruit.
The tool is not bad. It is simply sized for another crop. Fit problems also increase with soft fruit.
Small cherries have less mass to resist the plunger.
If they are warm, they deform fast. That makes the pit harder to eject.
The Three Variables That Decide Whether Cherries Fit
Fit comes down to three things. Diameter decides whether the cherry can be held. Firmness decides whether it can be pushed.
Tool clearance decides whether the fruit stays aligned.
Diameter, Firmness, and Tool Clearance
Diameter is the first gate. If the cherry is under the guide opening, it will not stay centered. Firmness matters almost as much.
A soft small cherry deforms instead of feeding.
Tool clearance is the gap around the fruit. Too much gap allows tilt. Too little gap jams the cherry.
The best fit leaves light movement without crushing.
| Factor | What it controls | Failure sign |
|---|---|---|
| Diameter | Centering in the guide | Cherry slips through |
| Firmness | Resistance to the plunger | Fruit crushes or tears |
| Tool clearance | Alignment over the pit | Plunger misses the pit |
Use this simple decision check.
- If the cherry falls through the guide, the opening is too large.
- If the cherry crushes, the fruit is too soft or the plunger is too aggressive.
- If the pit remains, the cherry was off center or the pin is misaligned.
Manufacturer specifications indicate that small changes matter. A gap of 1 to 2 mm can let a small sour cherry tilt. That is why a pitter can handle large crop fruit and fail on a backyard batch.
Cherry shape adds another twist. Some fruit is round. Some is slightly oval.
An oval cherry may center one way and not the other.
That can cause missed pits even when diameter looks fine.
Pit orientation matters too. The pit is not always centered inside the fruit. A cherry can look round and still have an offset pit.
That is common in small backyard fruit.
Wet skin can add another problem. A slick cherry may slide instead of gripping the guide. Pat the fruit dry before pitting.
Dry skin gives the tool better control.
Measure the Cherries Before You Blame the Tool
Measure before you change tools. The fastest fix is knowing the actual cherry diameter. Use digital calipers if you have them.
A ruler can work, but it is less consistent.
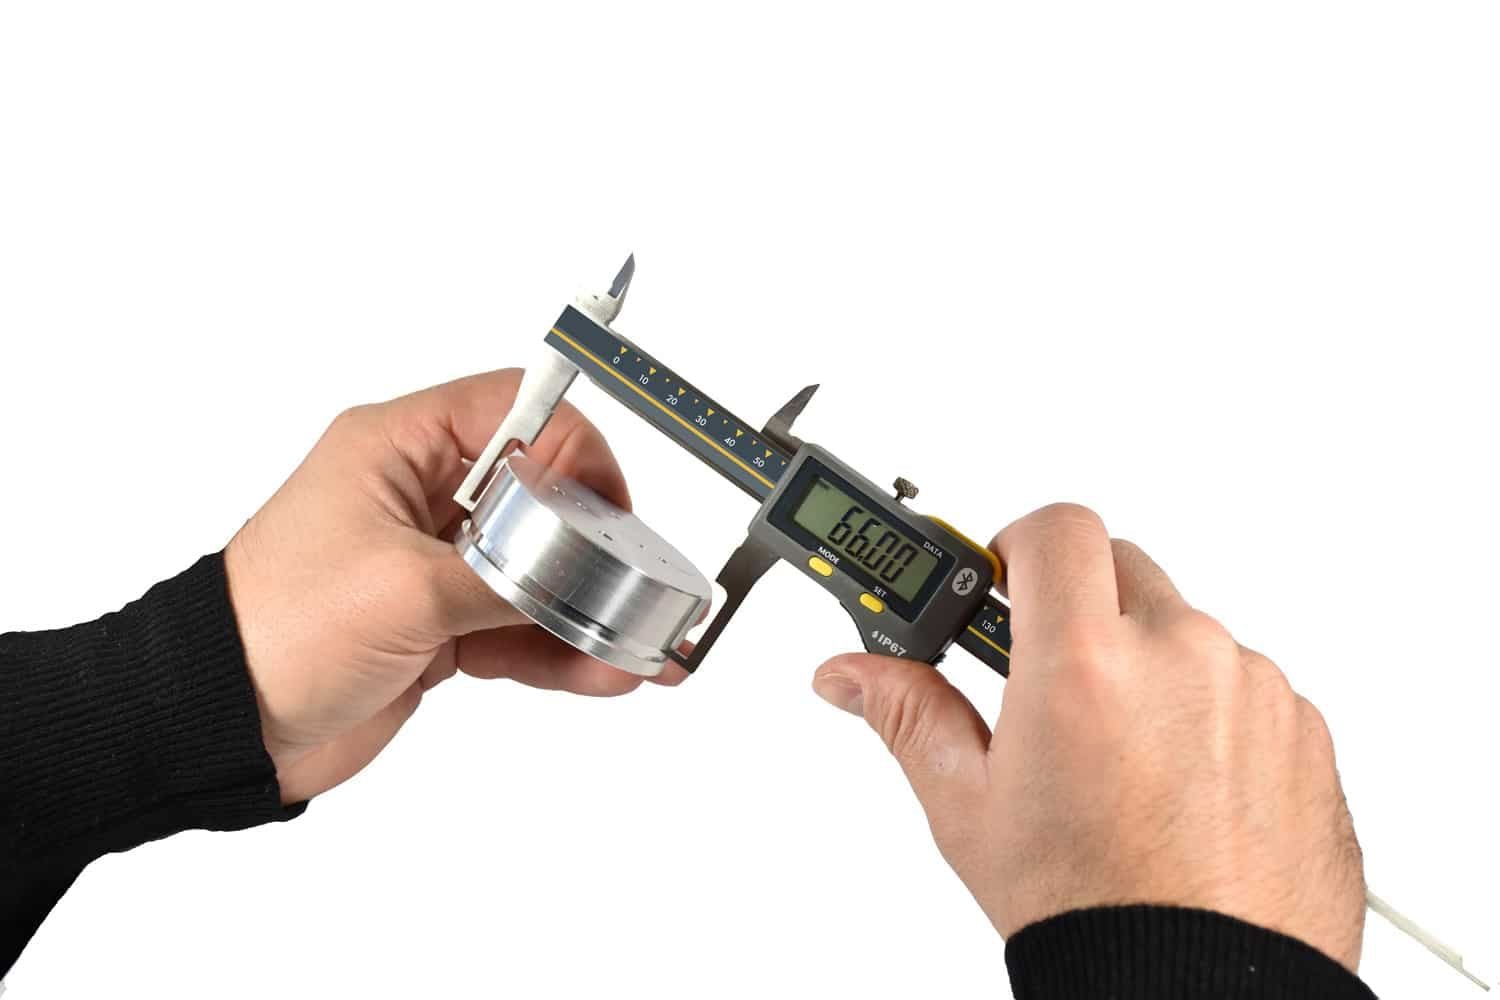
Image source: Bing (Web (fair-use with source credit))
Many digital calipers read to 0.01 mm. Manufacturer specifications from Sylvac list that resolution for many external digital calipers. You do not need lab precision.
You only need a reliable size range.
Here is a practical sorting method.
- Pick 10 cherries from different parts of the batch.
- Measure each cherry at its widest point.
- Write down the smallest and largest values.
- Group the batch by size before processing.
Do not measure only the biggest cherries. That gives a false sense of fit. Measure fruit from the top, middle, and bottom of the bowl.
Small fruit often hides at the bottom.
Use this quick reference.
| Measured diameter | Likely fit behavior |
|---|---|
| Under 14 mm | High slip and missed pit risk |
| 14 to 16 mm | May work with reduced clearance |
| 16 to 18 mm | Often works in adjustable pitters |
| Over 18 mm | Usually fits standard sweet cherry tools |
If most cherries fall under 14 mm, stop fighting the pitter. The tool is not broken. The fruit is outside its design range.
At that point, sorting becomes more important than technique.
A mesh screen can speed this up. A 14 mm opening removes the smallest fruit fast. A 16 mm opening creates a more uniform middle group.
This matters a lot for large harvests.
You can also make a simple template. Cut holes in stiff cardboard at 14 mm and 16 mm widths. Drop cherries through each hole.
This is not pretty, but it works.
Label your sorted piles right away. Keep the smallest fruit for cooking. Use the middle group for pitting.
Save the largest fruit for fresh use or molds.
If Cherries Are Too Small for a Cherry Pitter
If cherries are under the pitter range, you have three useful paths. Adjust the tool, switch tools, or change the end use. Trying to force the same setup usually creates more waste.
Adjustable Pitters, Olive Pitters, and Manual Coring Alternatives
An adjustable cherry pitter uses a smaller guide, shim, or replaceable plate. The goal is to reduce side movement. Aggregate reviews report that this works best when the fruit is only slightly small.
If the batch is very small, adjustment may not be enough.
An olive pitter can handle smaller fruit better than many cherry pitters. It has a narrower cradle. It also suits small sour cherries from backyard trees.
The tradeoff is slower throughput.
A manual coring tool or thin corer can work for very small batches. This method gives more control. It also takes more time.
Use it when appearance matters and the batch is short.
| Option | Best for | Limitation |
|---|---|---|
| Adjustable cherry pitter | Slightly undersized batches | Still limited by smallest fruit |
| Olive pitter | Small sour cherries | Slower for large batches |
| Thin coring tool | Very small or delicate fruit | High time per cherry |
Use the branch table to avoid guesswork. Match the method to the smallest fruit in the batch. Do not judge by the largest cherry.
| Cherry size | Best next move |
|---|---|
| Under 14 mm | Cook, press, or hand pit |
| 14 to 16 mm | Reduce clearance or use olive pitter |
| 16 to 18 mm | Use adjustable cherry pitter |
If the batch is mixed, sort first. Run the large fruit through the pitter. Process the middle group with adjustments.
Send the smallest fruit to a cooked use.
If you only have a fixed pitter, you can still improve fit. Place a food safe shim under the guide plate. Reduce the opening a little at a time.
Test after each change.
Do not make the gap so tight that the cherry splits. You want the fruit held, not squeezed. If the skin breaks before pitting, the gap is too small.
That also creates sticky buildup.
For very undersized fruit, change the recipe plan. Chop the cherries and remove pits by hand. Cook the fruit and strain it for sauce.
Press small cherries for juice if the crop is abundant.
If you plan to can the fruit later, keep food handling safe. Follow research based guidance from the National Center for Home Food Preservation. Clean tools and sorted fruit give better results than rushing the batch.
If the Pitter Fits the Cherry but Misses the Pit
This problem is different. The cherry stays in the tool, but the pit remains in the fruit. That usually points to alignment, not size alone.
The plunger is pushing beside the pit.
Start with these checks.
- Center the cherry before each press.
- Make sure the stem scar faces the correct direction if the tool has a guide.
- Reduce the guide gap if the fruit can tilt.
- Check whether the ejector pin is bent or dirty.
Firmness also plays a role. A soft cherry collapses before the pit releases. Chilling the fruit for 20 to 30 minutes can help it hold shape.
This is especially useful for small sour cherries.
If the pit still remains, run a test plate. Pit 10 cherries and cut them open. Count the misses.
If more than 1 or 2 fail, stop and adjust the setup.
Use the table to isolate the fault. Change one variable at a time. Test five cherries after each change.
This keeps the fix simple and repeatable.
| Symptom | Likely cause | Fast fix |
|---|---|---|
| Pit stays in fruit | Off center cherry | Realign and reduce gap |
| Fruit tears | Too soft or too tight | Chill fruit and widen guide |
| Pit fragments appear | Ejector path blocked | Clean pin and channel |
Continuing will only bury pit fragments in the batch. That creates a safety issue. Pit pieces can damage teeth.
They also ruin the texture of jam or pie filling.
For large batches, build in a final check. Spread pitted cherries on a tray. Press lightly across the fruit.
Your fingers will find hard spots faster than your eyes will.
Clean the pitter often during long sessions. Juice and skin can build up around the pin. That changes alignment over time.
A quick rinse and dry can restore consistent performance.
If Small Cherries Will Not Sit Right in a Mold
Small cherries fail in molds when the cavity is too wide or too deep. The fruit tilts, rolls, or leaves a gap that fills with coating. That gives sloppy edges and uneven centers.
Measure the cavity and compare it with the cherry diameter. A cavity made for a 20 mm sweet cherry can be too loose for a 13 mm sour cherry. The extra space lets the fruit move before the coating sets.
| Cavity condition | What happens | Best fix |
|---|---|---|
| Too wide | Cherry rolls | Use larger fruit or chopped centers |
| Too deep | Cherry sinks | Use a shallower mold |
| Stem left on | Fruit props up | Remove stems fully |
| Fruit too soft | Cherry flattens | Chill before molding |
Reserve the largest, firmest cherries for molds. Send undersized fruit to fillings, sauces, or chopped centers. Silicone molds tolerate slight movement better than rigid polycarbonate molds.
What if the cherry looks sunken?
Sunken fruit means the cavity is too deep or the fruit is too soft. Chill the cherries for 20 to 30 minutes. If the problem continues, chop the fruit instead of molding it whole.
If Cherries Fit the Jar but Pack Poorly for Canning
A cherry may pass through the jar mouth and still pack badly. Regular mouth jars open around 70 mm. Wide mouth jars open around 86 mm.
The real issue is fruit uniformity, not just the opening.
Small cherries shift into loose clusters. That leaves gaps, floaters, and uneven liquid coverage. For safe canning, follow tested fruit procedures and keep the fruit below the recommended headspace.
Use this branch logic.
- If the fruit is uniform, pack gently in layers.
- If the batch is mixed, sort by size first.
- If float is severe, use a tested hot pack or crushed method.
- If the fruit is very small, consider a chopped pack.
Wide mouth jars reduce bruising and make placement easier. Pack one test jar, add liquid, and tap it lightly. If the fruit rises sharply, repack with tighter layers or smaller pieces.
Sorting Workflow for Mixed Size Backyard or Orchard Cherries
Mixed batches need sorting before tool selection. One tiny cherry can slip through a pitter, and one soft cherry can crush into the batch. Sorting turns random fruit into predictable piles.
Use this home scale workflow.
- Remove stems, leaves, and damaged fruit.
- Pat wet cherries dry.
- Measure 10 random cherries at the widest point.
- Screen the batch by size.
- Keep each pile separate by end use.
| Screen opening | Fruit removed | Best use |
|---|---|---|
| 10 mm | Tiny fruit | Juice or discard if damaged |
| 14 mm | Undersized cherries | Cooked sauce or jam |
| 16 mm | Medium small cherries | Adjusted pitting or hand pitting |
Keep sorted fruit cold. Warm cherries soften fast and pit poorly. If you cannot process the same day, store the piles in shallow containers.
Deep bowls crush the fruit at the bottom.
When Undersized Cherries Are Better Chopped, Cooked, or Pressed
Some cherries are too small to pit cleanly as whole fruit. If most fruit measures under 14 mm, change the end use. Cooking, chopping, or pressing usually saves time.
Chopping works well for firm tiny cherries. You remove pits by hand while cutting. This is slower per fruit, but it avoids crushed whole cherries.
Cooking is better for soft fruit. Heat breaks down the flesh, and a sieve or food mill can remove pits and skins. Pressing suits large crops of very small fruit, especially for juice or jelly.
| Fruit condition | Best method | Best end use |
|---|---|---|
| Firm but tiny | Hand chop | Pie filling or compote |
| Soft and small | Cook and strain | Sauce or jam |
| Large tiny crop | Press | Juice or jelly |
Do not force tiny fruit into a whole pack just because it looks cute. Match the method to the fruit.
Mistakes That Make Small Cherries Jam, Crush, or Leave Pits Behind
Most failures come from skipping fit checks. Small fruit exposes every gap, bend, and sticky spot fast. A small error becomes a ruined batch quickly.
Avoid these mistakes.
- Using a pitter set for sweet cherries on sour cherries.
- Skipping diameter checks before a large batch.
- Feeding wet cherries that slide in the guide.
- Letting fruit warm up before pitting.
- Running mixed sizes through one setup.
- Ignoring bent pins or clogged ejector channels.
Use quick branch checks.
- If cherries slip, reduce the guide opening.
- If cherries crush, chill them or widen the guide slightly.
- If pits remain, realign the fruit and clean the ejector path.
- If jams repeat, stop and sort again.
Clean the tool often. Juice dries sticky and pulls small cherries off center. Rinse and dry the pitter every 15 to 20 minutes during heavy use.
Safety Checks for Pit Fragments, Canning, and Food-Contact Tools
Pit fragments can crack teeth. They also ruin jam and sauce. After pitting, spread the fruit on a tray.
Press lightly to find hard spots.
Use tested canning methods. Do not guess processing times. Wash food contact tools well.
Rinse away sticky juice before it traps debris.
Decision Guide: What to Do Based on Cherry Size and End Use
Choose by the smallest cherry in the batch. Do not judge by the largest fruit.
- Under 14 mm: cook or press.
- 14 to 16 mm: reduce clearance.
- 16 to 18 mm: adjustable pitter.
- Over 18 mm: standard pitter.
If fruit is soft, chill it first. If pits remain, sort again.
FAQs About Small Cherries Not Fitting
Why won't small cherries fit in my pitter?
Small cherries have too much guide space. They tilt under pressure. The pin misses the pit.
Measure the fruit. If most are under 14 mm, cook or hand pit.
Can I use an olive pitter for small cherries?
Yes. An olive pitter has a narrower cradle. It holds small sour cherries better.
It is slower. Use it for small batches.
How do I stop cherries from crushing?
Chill cherries 20 to 30 minutes. Firm fruit resists the plunger. Check the guide gap.
If it is too tight, widen it slightly. Dry skins first.
Are missed cherry pits dangerous?
Yes. Pit pieces can damage teeth. They also create a choking risk.
Check pitted fruit before cooking. Press gently on a tray to find hard spots.