Why Your Cherry Pitter Misses the Pit
If your Cherry Pitter Misses the Pit, the problem is usually alignment, not bad fruit. The punch must travel through the cherry from stem scar to blossom end. When that path shifts, the pit slides aside instead of popping out.
Most fresh sweet cherries run about 18 to 30 mm across, while pits often measure 8 to 14 mm long. That small gap leaves little room for a dull punch or loose hinge. Let's sort the symptom first, then fix the tool.
Why Your Cherry Pitter Misses the Pit
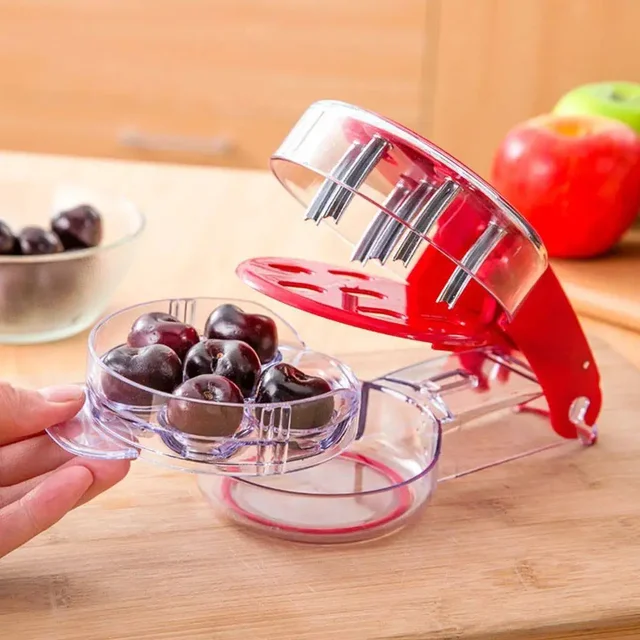
Image source: Bing (Web (fair-use with source credit))
Quick Answer
A Cherry Pitter Misses the Pit when punch and pit stay misaligned. Most misses come from setup, not the fruit. The cherry may sit crooked in the cradle.
A dull or bent punch pushes the pit sideways. Tighten the hinge, clean the chute, sort by size.
Why a Cherry Pitter Misses the Pit
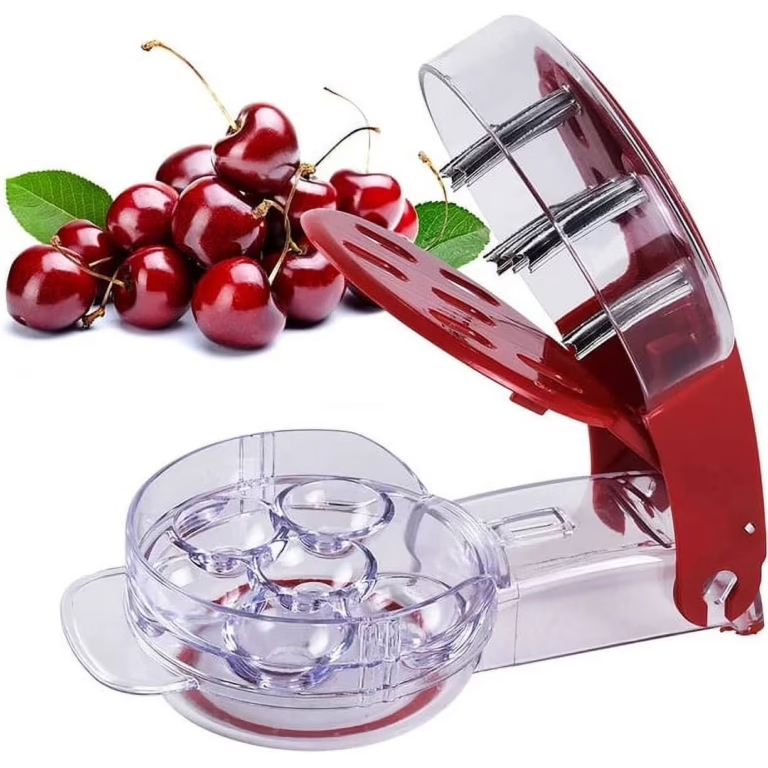
A cherry pitter is a simple press. The cradle holds the fruit. The punch drives through the cherry and pushes the pit out through a slot.
When the pit stays inside, the punch did not meet the pit on its long axis. That can happen because the cherry is tilted, too small, too soft, or off center. It can also happen because the tool is worn.
In our research, the most common cause is loading angle. As of 2026, many handheld pitters are built for average sweet cherries. Manufacturer specifications often assume firm fruit and a centered pit.
That assumption breaks down with small sour cherries, jumbo supermarket fruit, or overripe batches. The tool may be fine. The setup may still be wrong.
Use this simple split:
- If the pitter misses every time, suspect tool alignment or the wrong tool size.
- If it misses only on some cherries, suspect fruit size, firmness, or loading angle.
- If it used to work but now fails, suspect juice buildup, a loose hinge, or a bent punch.
That split saves time. You stop blaming the whole batch when one variable is the real issue.
What the Missed Pit Pattern Tells You
The missed pit leaves clues. Look at the cherry after one press. The mark tells you where the punch went.
A clean cherry with no pit mark means the punch never reached the pit. The fruit may be sitting too high. The punch stroke may be too short.
The cherry may also be loaded sideways.
A side gouge means the punch hit the pit but pushed it across the flesh. That is an alignment problem. The cradle may be too wide.
The hinge may have side play.
A crushed cherry means the flesh gave way before the pit moved. This often shows up with soft fruit. It can also mean the punch edge is dull.
A dull edge mashes instead of cutting.
Broken pit pieces mean the punch hit hard and direct. That is better than a whole pit left behind, but it creates fragment risk. You still need to check each cherry if the finished dish matters.
A quick inspection habit helps:
- No mark: fix orientation or stroke.
- Side mark: fix centering and alignment.
- Crushed fruit: chill fruit or sharpen the tool.
- Pit fragments: inspect and rinse the exit slot.
The Main Variables That Control Clean Pitting
Clean pitting comes from four things working together. The fruit must sit centered. The punch must travel straight.
The punch must be sharp enough. The tool must stay tight under pressure.
Cherry Size, Firmness, and Ripeness
Size sets the fit. Sweet cherries often run about 18 to 30 mm across. Sour cherries often run about 12 to 20 mm across.
Firmness matters just as much. Cold, ripe cherries hold their shape. Warm or overripe cherries collapse.
That collapse lets the pit tilt away from the punch. The punch then pushes past the pit instead of driving it out.
If fruit is soft, chill it for 20 to 30 minutes. Pat it dry before pitting. Wet fruit can slip in the cradle and ruin alignment.
Punch Diameter, Stroke, and Sharpness
The punch needs enough width to contact the pit. If it is too narrow, it can slip beside the pit. If it is too wide, it can crush the fruit before the pit releases.
Stroke length also matters. The punch must pass fully through the cherry. A short stroke can leave the pit lodged near the blossom end.
Sharpness affects the feel. A sharp punch cuts a clean path. A dull punch pushes flesh aside and increases pressure.
Official brand guidance from OXO points users to keep food-contact parts clean and undamaged. That helps the punch move as designed.
Cradle Fit, Hinge Tightness, and Spring Return
The cradle is the seat that centers the cherry. If the seat is too large, small cherries roll. If it is too small, large cherries sit above the punch path.
A loose hinge lets the punch drift. That drift turns a straight press into a sideways push.
A weak spring can also stop the tool from returning fully. That makes the next press inconsistent.
Sticky cherry juice makes this worse. Rinse the punch and chute before residue dries. Clean tools hold alignment better, and food-safety guidance from the [U.S.
Food and Drug Administration](https://www.fda.gov) supports keeping kitchen tools clean and dry.
Decision Tree: Match the Symptom to the Fix
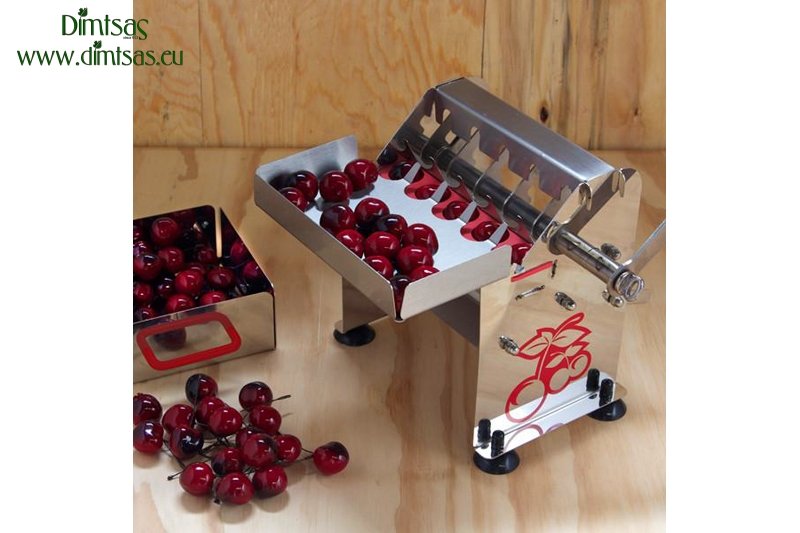
Image source: Bing (Web (fair-use with source credit))
Use the symptom, not the brand name, to choose the fix. The same pitter can work well on one batch and fail on another. Match what you see to the likely cause.
| Symptom | Likely cause | First fix |
|---|---|---|
| Pit stays whole inside | Wrong cherry angle | Reload along stem to blossom axis |
| Pit moves but stays inside | Punch drift | Tighten hinge and clear chute |
| Cherry crushes | Soft fruit or dull punch | Chill fruit and inspect punch |
| Large fruit works, small fails | Cradle too wide | Sort small fruit and use smaller tool |
| Sudden miss rate rises | Residue or wear | Clean, dry, and check alignment |
Pit Stays Whole Inside the Cherry
If the pit is untouched, the punch missed it completely. Reload the cherry with the stem scar facing the punch path. Many pitters work best when the cherry sits along its natural stem to blossom line.
Press fully and watch the exit slot. If no pit comes out, stop and look inside. A hidden pit can block the next cherry.
If every cherry fails this way, the punch may be too short or too narrow for your fruit size. The tool may be an olive pitter or a small fruit pitter, not a true cherry pitter.
Pit Moves Sideways but Does Not Exit
If the pit moves but stays trapped, alignment is the main suspect. The punch is hitting the pit at an angle. That angle pushes the pit into the side wall instead of out.
Check the hinge for side play. Wiggle the handles gently. If they shift before the punch moves, the tool needs tightening or replacement.
Clear the pit chute too. Dried pulp can block the exit path. A blocked chute makes the pit bounce back into the fruit.
Cherry Crushes or Splits Without Pitting
If the cherry flattens, the flesh failed before the pit released. This is common with warm fruit, overripe fruit, or thawed frozen cherries.
Chill the batch first. Firm fruit gives the punch a stable path. If the fruit is still too soft, switch to a knife or a small hand method for that batch.
If firm fruit still crushes, inspect the punch edge. A bent or dull edge increases force. It also tears the cherry instead of making a clean hole.
Large Cherries Work, Small Cherries Fail
If large cherries pit well but small ones fail, the cradle is too roomy. Small cherries do not stay centered. They tilt, roll, or sit below the ideal punch path.
Sort cherries by size before you start. Aggregate reviews report the same pattern with mixed fruit sizes. Process the largest fruit first.
Then adjust your method for the smaller batch. For very small sour cherries, use a smaller pitter if you have one.
If not, plan to hand check each piece. A missed pit in a small cherry is easy to miss by touch.
It Worked Before but Now Misses Often
If the tool used to perform well, look for wear and buildup first. Cherry juice is sugary and sticky. It can gum up the spring and the exit slot.
Rinse the tool in warm water. Use a small brush around the punch and chute. Dry it fully before storage.
Then inspect the parts. Look for a bent punch, a cracked cradle, or a loose screw. If alignment will not stay true after cleaning and tightening, the pitter has likely worn out.
How to Load Cherries Along the Stem-to-Blossom Axis
The goal is to make the punch follow the natural pit channel. Cherries are not perfectly round. The pit sits along an axis from stem scar to blossom end.
Load each cherry with the stem scar facing the punch if your pitter marks that direction. If the tool has no mark, place the stem scar toward the entering punch. This gives the punch the shortest clean path.
Use a consistent hand rhythm. Pick, seat, press, release. If you rush and toss cherries in sideways, miss rates climb fast.
For soft fruit, seat it gently. Do not squeeze. Squeezing shifts the pit before the punch arrives.
If cherries still have stems, remove them first. Stem bits can prop the cherry at an angle. That angle pushes the punch off the pit.
What if the cherry rolls in the cradle?
If the cherry rolls, the cradle is too wide or the fruit is too small. Sort smaller cherries separately. You can also turn the cherry so its narrower side sits down.
For very small sour cherries, expect more hand checks. A smaller pitter or hand method may be faster.
Adjustments That Improve Punch Alignment
Alignment is fixed by small mechanical changes, not harder pressing. Pressing harder often worsens crushed fruit. It also speeds up wear.
Start with an empty tool check. Close the handles slowly. Watch whether the punch drops straight into the cradle center.
If it drifts left or right, inspect the hinge. Tighten any screw or rivet that allows play. If the hinge is loose and cannot tighten, the tool will keep missing.
Next check the punch face. It should not be bent, chipped, or caked with dried pulp. A bent punch can sometimes be eased back gently with pliers, but only if it is a simple metal rod.
| Adjustment | What it fixes | What to watch |
|---|---|---|
| Center the cherry seat | Side misses | Fruit rolling |
| Tighten hinge | Punch drift | Wobble under pressure |
| Clear exit slot | Pit bounce back | Dried pulp |
| Check spring return | Short stroke | Punch not fully seating |
If the tool has a size adjustment, set it for your average cherry. Manufacturer specs for many pitters target medium sweet cherries. Jumbo fruit may need a wider seat or different tool.
For handheld plungers, keep the base flat on the counter. Tilting the body changes the punch angle. A non-slip mat helps during bulk work.
Cleaning, Clearing Jams, and Restoring Smooth Ejection
Sticky juice is a common hidden cause. Cherry sugars dry like glue. That residue slows the punch and blocks the pit chute.
Rinse the pitter soon after use. Warm water softens dried pulp faster than cold water. Use a small brush around the punch tip and exit slot.
For a jam during a batch, stop immediately. Open the tool and remove the trapped pit. Do not force the handles, because that can bend the punch.
If the spring feels weak, clean around it first. Gunk can make a good spring feel dead. Dry the parts fully before storage.
A quick mid-session habit helps:
- Rinse every 20 to 30 minutes during heavy juicing.
- Clear visible pit fragments before the next press.
- Wipe the cradle so cherries do not slide on wet pulp.
- Dry metal parts to reduce corrosion.
If the pitter is dishwasher safe, check the manufacturer instructions. Some plastic parts warp in high heat. Warping can quietly ruin alignment.
When to Repair, Replace, or Switch to Another Pitter Type
Repair makes sense when the problem is residue or a loose part. Replace makes sense when alignment cannot stay true. Switch types when your fruit no longer matches the tool.
Keep the pitter if it passes this check:
- The punch moves straight with no side wobble.
- The spring returns fully after each press.
- The cradle holds the fruit without rolling.
- The exit slot clears pits cleanly.
Replace it if the body cracks, the hinge wallows out, or the punch bends again after straightening. Cheap pitters often flex under firm fruit. That flex causes misses even when the cherry is loaded correctly.
Switch to a countertop crank pitter if you process large batches. These tools often handle variable fruit sizes better. They also reduce hand fatigue.
Switch to a smaller pitter if you mainly pit sour cherries or small wild cherries. A large cradle will never center them well. For occasional small batches, a knife or cherry pin may be faster than fighting the wrong tool.
Mistakes That Increase Missed Pits and Broken Fruit
Most missed pits come from avoidable habits. The biggest mistake is treating every cherry batch the same. Fruit size and firmness change the setup.
Another mistake is pressing faster than you can seat the fruit. Speed feels efficient, but it raises miss rates. It also makes cleanup harder because more juice escapes.
Avoid these common errors:
- Loading cherries with stems still attached.
- Pitting warm fruit straight from the counter.
- Ignoring a small bend in the punch.
- Letting pulp dry inside the chute.
- Using an olive pitter for large sweet cherries.
- Forcing a jammed handle instead of clearing the pit.
Also avoid overfilling the work bowl. Cherries piled on top of each other bruise. Bruised fruit becomes soft and harder to pit cleanly.
If your miss rate rises, stop and check one variable at a time. Change loading angle first. Then check fruit firmness.
Then inspect the tool.
Best Workflow for Pies, Canning, and Bulk Cherry Prep
Sort cherries before you pit. Run large sweet cherries first, then small sour cherries. Mixed sizes cause misses because the cradle cannot center both well.
Chill soft fruit for 20 to 30 minutes. Pat the skins dry. Dry fruit grips the cradle and keeps the punch on the pit channel.
Work in batches. Keep unpitted cherries cold. Set aside misses for hand re-pitting instead of forcing them through again.
For pie prep, inspect pitted cherries by feel. For canning, check each cherry visually because a hidden pit can ruin a jar.
Safety Checks for Pit Fragments, Pinch Points, and Sticky Buildup
Keep fingers clear of the fruit seat while pressing. A cherry pitter has a small pinch point, and juice makes handles slippery.
Watch for pit fragments. Broken pieces can hide inside the flesh and pose a dental risk. University extension food preservation guidance also stresses removing pits before storage for quality and safety.
Clean sticky pulp before it dries. Dried sugar can jam the chute and make the tool harder to control. Rinse, brush, and dry the punch after heavy juicing.
Quick Batch Checklist Before You Pit
Use this fast check before a full bowl:
- Sort cherries by size.
- Chill soft fruit and dry the skins.
- Seat one cherry along the stem scar axis.
- Press slowly and watch the exit slot.
- Stop if pits stop ejecting.
If the test cherry crushes, chill longer. If the pit stays whole, reload the fruit. If three misses happen in a row, clean and inspect the tool.
Final Decision Guide: Adjust the Pitter, Change the Method, or Buy a Better Tool
Adjust the tool when misses are new and occasional. Tighten the hinge, clear the chute, and reset the cherry angle. That fixes most sudden problems.
Change the method when the fruit is too soft or too small. A knife, cherry pin, or hand split may beat a mismatched pitter.
Buy a better tool when the punch wobbles or the body flexes. A crank pitter can help bulk work. A smaller pitter can help sour cherries.
Frequently Asked Questions
Why does my cherry pitter leave the pit inside?
It usually leaves the pit inside because the punch missed the pit axis. Reload the cherry with the stem scar facing the punch. Press fully.
If the pit has a side mark, center the fruit better and tighten the hinge.
How do I stop cherries from crushing?
Chill the cherries first. Firm fruit gives the punch a stable path. Dry the skins so they do not slip.
If crushing continues, check the punch edge for dullness, bending, or dried pulp. A damaged edge pushes flesh aside instead of cutting a clean path.
Can I use an olive pitter for cherries?
Sometimes, but only for small cherries. Many olive pitters have a narrower punch and smaller cradle. Large sweet cherries may sit too high and miss the pit.
Sort by size and test a few first. If the fruit rolls, switch tools.
How often should I clean a cherry pitter?
Rinse it during heavy prep, about every 20 to 30 minutes. Cherry juice dries sticky and can block the pit chute. Clean it fully after use and dry metal parts before storage.
If the spring feels slow, remove residue around it first.