Benefits of Using an Apple Corer for Faster, Easier Prep
Benefits of Using an Apple Corer often become obvious during pie night. You want clean rings, not ragged holes. A small tube tool can beat a knife for speed and consistency.
It also keeps fingers farther from the blade.
Most handheld apple corers use a 19 mm to 25 mm stainless steel tube. That size removes the seed pocket while saving usable flesh. As of 2026, the tool remains common in home baking drawers.
The comparison is simple once you know the parts.
Quick Answer
Benefits of Using an Apple Corer include speed, cleaner cores, and less waste. It removes seeds and stems quickly. It helps create even apple rings.
That supports faster pie and tart prep. It also reduces knife handling for new cooks.
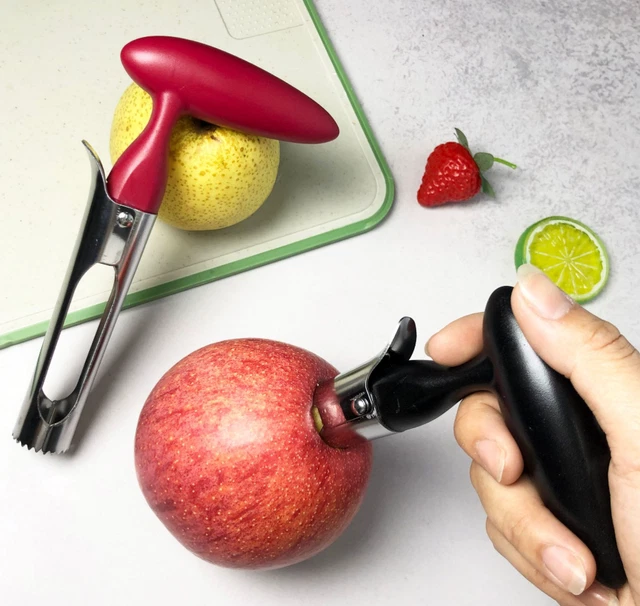
Image source: Bing (Web (fair-use with source credit))
Why an Apple Corer Is Worth Comparing Against a Knife or Slicer
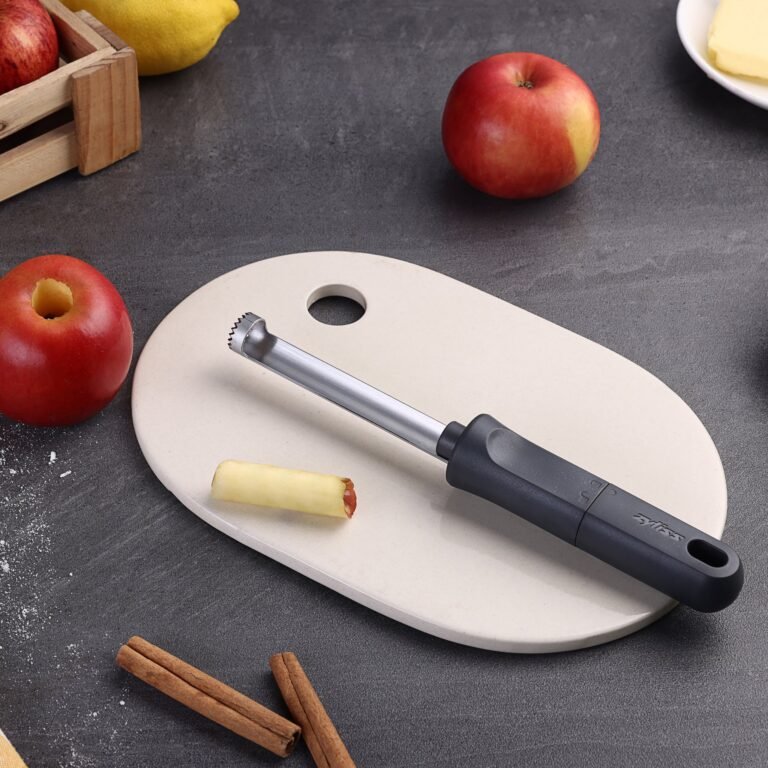
An apple corer is a narrow tube with a cutting edge and a handle. You press it through the apple from stem to base. The core exits as a small cylinder.
This leaves a clean hole for stuffing, slicing, or baking.
A paring knife gives more control. It also asks for more skill. You must cut around the seed pocket without taking too much flesh.
For one apple, that is fine.
For ten apples, fatigue and inconsistency show up fast. We usually compare three tools. They are the handheld apple corer, the paring knife, and the corer-slicer.
A corer-slicer is a press-style tool that cores and cuts wedges.
- Handheld apple corer: best for quick cores and round rings.
- Paring knife: best for irregular fruit and precision trimming.
- Corer-slicer: best when you want cored wedges in one motion.
The visual difference is easy to spot. A cored apple holds a neat tunnel through the center. Slices fall into even rings.
A knife-cored apple often has a jagged oval center.
This matters for more than looks. Even pieces bake at the same rate. They also dry more evenly in a dehydrator.
This gives you better texture in finished dishes.
The choice depends on your prep style. If you bake pies often, uniform rings matter. If you only eat fresh apples, a knife may be enough.
If you make large batches, a corer or corer-slicer saves time.
Manufacturer specifications often list tube diameter as the main sizing factor. A narrower tube saves flesh. A wider tube clears seeds more reliably.
This tradeoff is the heart of the comparison.
The tool also helps accessibility. Cooks with arthritis or weaker grip often prefer the push-and-twist motion. It requires less fine blade control.
Apple prep can feel less intimidating.
Basic handheld corers often cost about $5 to $15. Premium ergonomic models may reach $20. The cost stays low.
The real question is drawer space, not price.
The Real Problem With Coring Apples by Knife
Knife coring seems simple until the apple rolls. The seed pocket is small, tough, and easy to miss. A paring knife can leave seeds behind.
It can also remove a wide plug of good fruit.
The main frustrations are predictable:
- Uneven cores that leave bitter seeds.
- Ragged holes that ruin whole baked apples.
- Extra flesh loss around the seed channel.
- More hand movement during batch prep.
- Higher slip risk on firm, round fruit.
Firm varieties make this worse. Fuji, Honeycrisp, and Granny Smith apples are dense. The knife can skid along the core instead of cutting it.
Soft apples create another issue.
They may split or crush when you push a blade through. This can ruin rings for dehydrating. It also makes stuffed apples look messy.
A clean round cut is harder than it looks.
There is also a waste issue. Each extra cut removes flesh that could have stayed in the pan. Across a pie batch, that adds up.
A small core tube can leave more usable fruit behind.
Knife work also slows presentation. Apple rings look better when the center hole is round. A knife creates a patchwork cut.
This may not matter for sauce.
It matters for tarts, rings, and stuffed apples. Aggregate reviews often mention hand fatigue. People with reduced grip strength feel it first.
A corer changes the motion to a straight push and twist.
This can feel safer and more repeatable. It does not replace knife skills. It simply solves one narrow job more efficiently.
General fruit handling advice from the U.S. Department of Agriculture also supports removing cores and damaged tissue cleanly.
How an Apple Corer Works and Which Parts Matter
A handheld apple corer works like a small hollow punch. The cutting ring scores the flesh. The tube walls capture the core.
You twist slightly, pull upward, and eject the waste.
The best designs share a few traits. They use stainless steel. They have a comfortable handle.
They leave enough clearance for the core to exit without jamming.
Cutting Tube Diameter and Edge Type
Tube diameter decides how much flesh you lose. Most models fall between 19 mm and 25 mm. A 19 mm tube suits small apples and saves fruit.
A 25 mm tube clears large seed pockets more easily.
Size choice should follow your fruit. Small lunch apples often need less diameter. Large baking apples may need a wider tube.
If the corer is too narrow, seeds can remain.
If it is too wide, you lose flesh. Match corer size to your usual apple supply. That is especially useful during harvest season.
Edge type affects the cut. A serrated edge bites into firm skin. A smooth edge can give cleaner rings on tender fruit.
In our research, serrated edges receive more praise for hard storage apples.
Smooth edges often work well when apples are ripe but not mealy. Wall thickness matters too. A thin wall cuts with less resistance.
A thick wall may feel stronger but removes more flesh.
Manufacturer specs rarely list wall thickness. Aggregate buyer feedback often reveals it through comments about jamming or tearing. Rust complaints usually point to poor drying or low-grade steel.
Carbon steel can hold an edge, but it needs careful drying.
Handle Grip and Core Ejection
The handle controls force. A narrow metal handle can dig into your palm. A wider soft-touch grip spreads pressure.
This helps during long prep sessions.
Weight matters less than balance. A very light corer can feel flimsy. A heavy one can tire the hand.
The best tools feel sturdy but not bulky.
Clean welding or smooth molding also reduces food traps. That makes rinsing faster. It also lowers the chance of trapped apple residue.
Core ejection is the deciding detail. Some tools leave the core stuck inside the tube. Others have enough open space to push it out with a finger or spoon.
Look for a design with clear side openings or a tapered tube.
Symmetrical designs work for right-handed and left-handed cooks. A hanging loop helps in small kitchens. It also aids drying.
Those small traits often separate a pleasant tool from an annoying one.
Storage is simple but often ignored. Keep the corer dry. Hang it if possible.
A damp drawer invites rust and stiff movement.
Basic food-contact cleanliness follows the kind of guidance summarized by the U.S. Food and Drug Administration. Rinse the tool soon after use.
Dry it fully before storage. If the tool is dishwasher safe, manufacturer care instructions still control.
Handheld Apple Corer vs Paring Knife vs Corer-Slicer
This is where the decision gets practical. Each tool solves a slightly different job. The right pick depends on fruit shape, batch size, and the final dish.
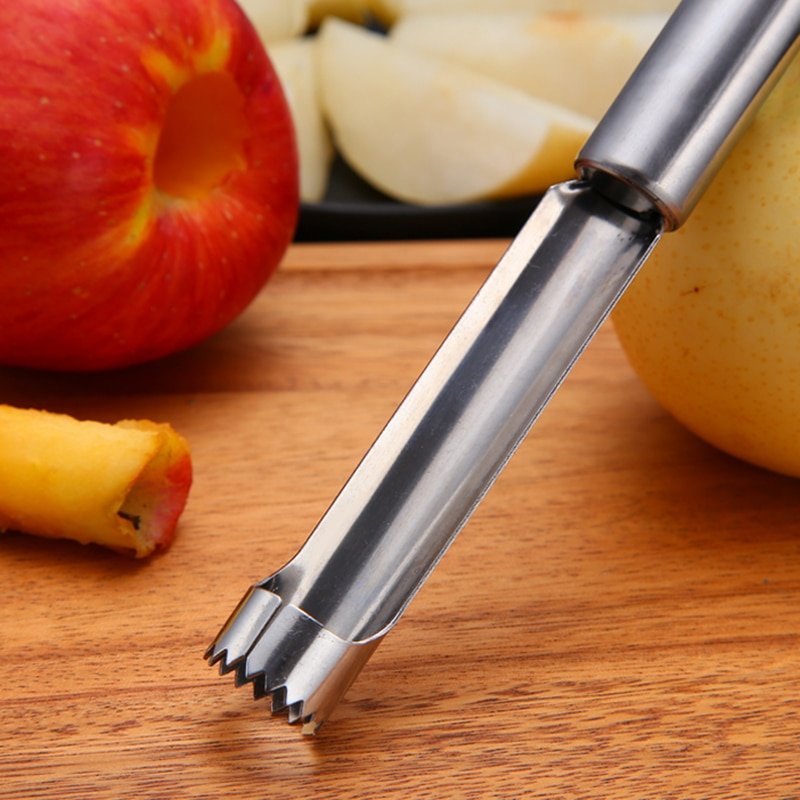
Image source: Bing (Web (fair-use with source credit))
A handheld corer is best when you want whole cored apples or clean rings. It keeps the apple round. It works well for baked apples, dehydrated rings, and pie prep where appearance matters.
A paring knife is best when the fruit is odd-shaped or bruised. You can steer around damage. It also avoids buying another unitasker.
The tradeoff is slower and less consistent results.
A corer-slicer is best when you want wedges fast. It cores and cuts in one press. It is great for snacks and lunch boxes.
It is less ideal when you need whole rings or stuffed apples.
| Tool | Best for | Main benefit | Main limit |
|---|---|---|---|
| Handheld apple corer | Whole apples and rings | Clean round core | One task only |
| Paring knife | Irregular fruit | Full control | Slower and less uniform |
| Corer-slicer | Fast wedges | Speed and consistency | Not for whole rings |
If you bake often, the handheld corer is usually the easiest upgrade. If you mostly slice apples for kids, a corer-slicer may give more value. If your kitchen is tiny and you already own a sharp paring knife, you may not need either.
Prep speed differences are small per apple. They become obvious across a pie batch. Aggregate reviews often put coring time at a few seconds per apple with practice.
Knife coring usually takes several cuts and more cleanup.
Cleanup is another practical split. A corer has one small cutting edge to rinse. A knife cut leaves more surfaces and often a stained board.
A corer-slicer may trap bits between blades.
Rinse it before sugars dry. That prevents sticky buildup. It also keeps the blades aligned.
Skill ceiling matters too. An older child can use a corer with supervision more safely than a knife. A corer-slicer is simple but bulky.
A knife remains the most flexible tool, but it demands practice.
Waste also shifts with tool choice. A wider corer removes more flesh. A careful knife can match it, but only with skill.
For repeatable results, the corer wins on consistency.
Seasonal context matters too. Apple harvest season in the U.S. and U.K. runs from late summer through autumn. Holiday baking increases prep volume.
A dedicated corer becomes more useful during those weeks.
Side-by-Side Comparison of Apple Coring Methods
The easiest way to compare methods is by the finished cut. A corer gives a round tunnel. A knife gives a custom opening.
A corer-slicer gives wedges.
| Method | Typical result | Speed | Waste risk |
|---|---|---|---|
| Handheld apple corer | Whole cored apple or rings | Fast after practice | Low with correct tube size |
| Paring knife | Custom cut core | Slower | Moderate to high |
| Corer-slicer | Cored wedges | Very fast | Low for wedge prep |
| Countertop peeler-corer-slicer | Peeled cored spiral | Fast for batches | Higher setup and cleanup |
Pick the handheld corer when the dish needs whole fruit or rings. Pick the knife when you must remove bruises or odd shapes. Pick the corer-slicer when snack speed matters more than presentation.
A countertop peeler-corer-slicer makes sense for large preserving jobs. It takes more space. It also needs more cleaning.
For most home bakers, that is overkill.
The main hidden cost is not price. It is inconsistency. Uneven pieces bake at different rates.
They also look less tidy on a tart.
Benefits of Using an Apple Corer for Baking, Snacks, and Batch Prep
The biggest gain is repeatable shape. A cored apple slices into neat rings. Those rings dry evenly in a dehydrator.
They also lay flat for pies and tarts.
Whole baked apples benefit just as much. The hole stays centered. Filling stays inside the fruit.
The apple keeps a pleasing shape during baking.
For snacks, speed matters. A corer can prep several apples quickly. This helps school lunches and weeknight fruit bowls.
The pieces look more appealing to kids.
Batch prep is where fatigue shows up. Knife coring asks for repeated small cuts. A corer uses one push and twist motion.
This can reduce hand strain.
Cooks with reduced grip strength often find this easier. The motion is more gross motor than fine blade work. That makes apple prep feel less technical.
Aggregate reviews often mention this accessibility benefit.
Waste control is another practical win. A correctly sized tube removes the seed channel and little else. Knife cuts often take extra flesh with the core.
Across many apples, that saved fruit adds up.
Where an Apple Corer Falls Short
A handheld corer is not perfect. It struggles with misshapen apples. If the fruit leans or bulges, the tube can miss seeds.
You may need a knife to finish the job.
Soft or mealy apples can split. The tube may crush instead of cut. Early-season apples often have tender flesh.
Firm storage varieties work better.
Cheap models can jam. The core sticks inside the tube. You then need a chopstick or spoon handle to clear it.
This kills the speed advantage.
Rust is another common complaint. Low-grade steel and damp drawers cause spots. Dishwasher use can make it worse if the tool is not fully rated for it.
Manufacturer care notes usually specify hand washing for many budget tools.
Storage can be awkward. The tube is narrow but long. It can poke into other utensils.
A hanging loop helps, but not every kitchen has rail space.
It also does one shape. It will not make wedges. It will not peel.
If you mainly want apple slices for eating, a corer-slicer may serve you better.
Best Apple Coring Tool by Use Case
The best tool follows the dish, not the gadget category. Start with the final cut you need. Then match the tool to that result.
- Whole baked apples: handheld apple corer.
- Apple rings for tarts or dehydrating: handheld corer, then slice.
- Quick snack wedges: corer-slicer.
- Irregular orchard fruit: paring knife.
- Large canning or pie batches: corer plus knife for touch-ups.
- Peeled cored apples for sauce: countertop peeler-corer-slicer.
- Limited hand strength: ergonomic handheld corer.
If you bake pies often, choose a corer with a 20 mm to 22 mm tube. That range often balances seed removal and flesh savings. If you buy large apples, lean toward 24 mm or 25 mm.
If you only eat fresh apples, skip the unitasker. A sharp paring knife is enough. If you make holiday pies every week, the corer earns its drawer space.
For families, the corer-slicer may win. It creates uniform wedges fast. It also reduces knife time around kids.
The handheld corer is better when presentation matters.
Mistakes That Make an Apple Corer Feel Useless
Most bad results come from poor alignment. The tube should follow the stem-to-base axis. If you angle it, seeds remain on one side.
Using the wrong diameter also causes problems. A narrow tube may leave seed pockets. A wide tube removes too much flesh.
Match the tool to your usual apple size.
Skipping the twist is another mistake. Pressing straight down can bruise firm fruit. A slight twist helps the edge score the flesh.
Then pull the core out cleanly.
Letting the tool stay wet invites rust. Apple acids and dishwasher detergent can dull cheap steel too. Rinse, dry, and store it in an open space.
Ignoring the calyx end creates grit. The bottom blossom end can hold debris. Check the hole after coring.
Trim any tough bits with a knife.
Forcing soft apples makes matters worse. If the fruit collapses, stop. Switch to a knife or save it for sauce.
A corer works best on firm, sound fruit.
Quick Answer: When an Apple Corer Actually Pays Off
Choose a corer for whole cored fruit, rings, or batch pie prep. Choose a corer-slicer for fast snack wedges. Keep using a knife for bruised or misshapen apples.
What to Look for Before Buying an Apple Corer
Choose stainless steel first. It resists rust better than cheap carbon steel. A smooth tube interior also helps the core release.
Pick a tube size that matches your fruit. Small apples work well near 19 mm to 20 mm. Large baking apples may need 24 mm to 25 mm.
Check the handle before price. A wider grip spreads pressure. A hanging loop helps drying in small drawers.
Avoid tools with rough welds. They trap pulp and can loosen over time. If product photos show a dull edge, skip that model.
Safe Coring Practices and Food-Contact Cleaning
Hold the apple flat on a board. Push the corer straight down, away from your palm. A slight twist helps, but do not force it.
Stop if the tube bends or the handle loosens. A damaged corer can slip. Replace it rather than risk a cut.
Rinse the tool soon after use. Apple sugar dries fast and can trap debris. Wash it with hot soapy water, then dry it fully.
Use the dishwasher only if the manufacturer allows it. Many budget tools last longer with hand washing. Store it dry, preferably hanging.
Final Verdict: Who Should Buy an Apple Corer?
Buy one if you bake pies or prep whole apples often. It gives clean holes and repeatable slices. It also reduces knife fatigue.
Skip it if you only slice a few apples each week. A paring knife can handle that easily. A corer-slicer may suit snack prep better.
Apple Corer FAQs: Worth It, Waste, and Cleaning
Is an apple corer worth buying?
Yes, if you core apples often for pies, baked apples, or rings. It improves consistency and can reduce flesh loss. For occasional snack prep, a sharp knife may be enough.
Does an apple corer remove too much fruit?
No, not when the tube size fits the apple. Narrow tubes save more flesh. Wide tubes clear seeds better but take more fruit.
How do you clean an apple corer?
Rinse it right after use. Wash it with hot soapy water and dry it fully. Dishwasher cleaning depends on the maker's instructions.
Can an apple corer be used on pears?
Yes, firm pears can be cored the same way. Soft pears may crush. Check the core for grit near the base.