Herb Scissors Explained: How They Actually Work
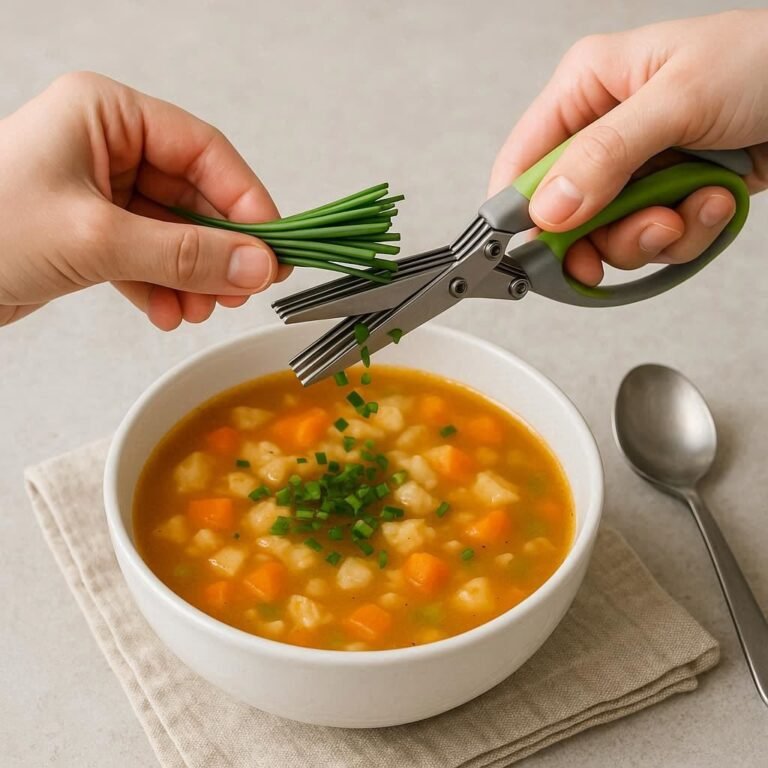
If you've ever stood over a cutting board with a pile of basil and a chef's knife, wondering why the leaves keep bruising and sticking to the blade, you already know the pain that herb scissors solve. The simple answer to how herb scissors work is this: they stack multiple stainless steel blades side by side, so one squeeze produces several parallel cuts at once. That means you go from a full bunch of cilantro to a fine, uniform chop in a single motion, with none of the "rocking the knife back and forth" dance.
Manufacturer specifications indicate that most herb scissors on the market use between four and six blades, spaced roughly 3 to 5 millimeters apart, depending on the model. The wider the gap, the chunkier the cut; the tighter the gap, the finer the result. As of 2026, the design has barely changed in a decade, which tells you it just works.
But understanding exactly how the blade stack, the pivot, and the handle geometry work together is the difference between a tool you reach for daily and one that sits in a drawer collecting dust. Let's break it down.
Quick Answer
Herb scissors work by using multiple stacked blades that cut through soft herbs in one squeeze. A pivot screw holds the blades in alignment, while the handle converts your grip into a single slicing motion. The blade gap controls the final cut size.
They work best on fresh, leafy herbs.
Why Herb Scissors Are Different From Regular Scissors
A regular pair of scissors has two blades that meet at a single point. That design is perfect for cutting paper, fabric, or twigs. But for herbs, it creates a problem: you have to make dozens of individual cuts to chop a small bunch, and each cut risks crushing the delicate leaf rather than slicing it cleanly.
Herb scissors flip the entire approach. Instead of two blades, they use a stack of four, five, or six blades arranged in parallel. When you squeeze the handles, every blade in the stack comes down simultaneously.
One press produces multiple cuts across the entire width of the herb bunch. It's essentially a mini guillotine array.
The mechanism relies on a few key elements:
- The blade stack: Multiple blades fixed at equal intervals
- The pivot screw: Holds all blades in alignment and controls tension
- The handle geometry: Gives you mechanical leverage to push through soft plant matter
- The blade gap: Determines the size of the final cut
Here's the part that surprises most people: herb scissors don't actually "scissor" in the traditional sense. The blades don't slide past each other like a standard pair of shears. Instead, they act more like a stamp or a chop.
The top set of blades presses down into a bottom set (or a cutting surface), and the herb gets sliced at multiple points simultaneously.
What the "cupping" technique does
If you've watched someone use herb scissors efficiently, you've probably seen them cup the blades in their palm after cutting. That's not just a flourish. The "cupping" technique involves holding the scissors upside down after a cut, so the chopped herbs sit in the concave curve of the blade stack.
Then you scrape them directly into a bowl or pan.
This works because the blades form a shallow V-shape when held horizontally. The herbs collect in the center, and a quick swipe with your thumb pushes them off cleanly. It's a small detail, but it's the reason herb scissors feel so much faster than a knife for garnishing work.
Anatomy of Herb Scissors: What You're Actually Looking At
Understanding how herb scissors work means understanding the parts. Every pair on the market, from a basic 4-blade model to a premium 6-blade set, uses the same fundamental components. Let's walk through each one so you know exactly what you're looking at.

Image source: Web (Bing) / amazon.com (Web image (fair-use with source credit))
The blade stack
This is the heart of the tool. The blades are thin, stainless steel strips, usually between 1.5 and 2 inches long. They're mounted in parallel, with small spacers or washers between each one to maintain an even gap.
That gap is what creates the consistent cut size.
On a 5-blade model, you get five cutting edges. That means one squeeze produces four separate cuts (the gaps between the blades). A 6-blade model gives you five cuts.
More blades equal finer chopping, but they also increase the chance of clogging, which we'll cover in the mistakes section.
The pivot screw
The pivot screw runs through the center of the blade stack. It's the single most important mechanical part of the tool. It serves two jobs: keeping all the blades aligned and maintaining the correct tension.
If the screw is too loose, the blades shift sideways during a cut. That causes tearing instead of slicing, and it lets herbs slip between blades unevenly. If it's too tight, the blades bind, and you have to force the handles closed, which crushes the leaves.
Most quality models use a screw that you can adjust with a small screwdriver or a coin slot. Cheaper models often use a rivet that can't be tightened, which is why they degrade quickly. Aggregate owner reviews consistently mention pivot loosening as the number one reason a pair stops working well after a few months.
Handle design
The handles are where ergonomics come into play. Most herb scissors use one of two configurations:
- Symmetrical loops: Both fingers and thumb go through loops, like standard scissors
- Thumb loop + finger rest: One large loop for multiple fingers and a smaller loop or padded rest for the thumb
The second design is more common on higher-end models because it distributes pressure across more fingers. That reduces hand fatigue when you're chopping a large bunch. It also gives you better control for the "cupping" pickup motion.
The cleaning comb
Most herb scissors ship with a small plastic or silicone comb. It looks like a tiny hair pick, and it's easy to dismiss as cheap packaging. It's not.
The comb slides between the blades to push out stuck herb fibers, and it's the only practical way to clean the tool without disassembling it.
Skip the comb and you'll find yourself rinsing, re-rinsing, and still finding basil bits wedged between the blades. We'll go deeper on this in the maintenance section, but remember: the comb is part of the tool's design, not an afterthought.
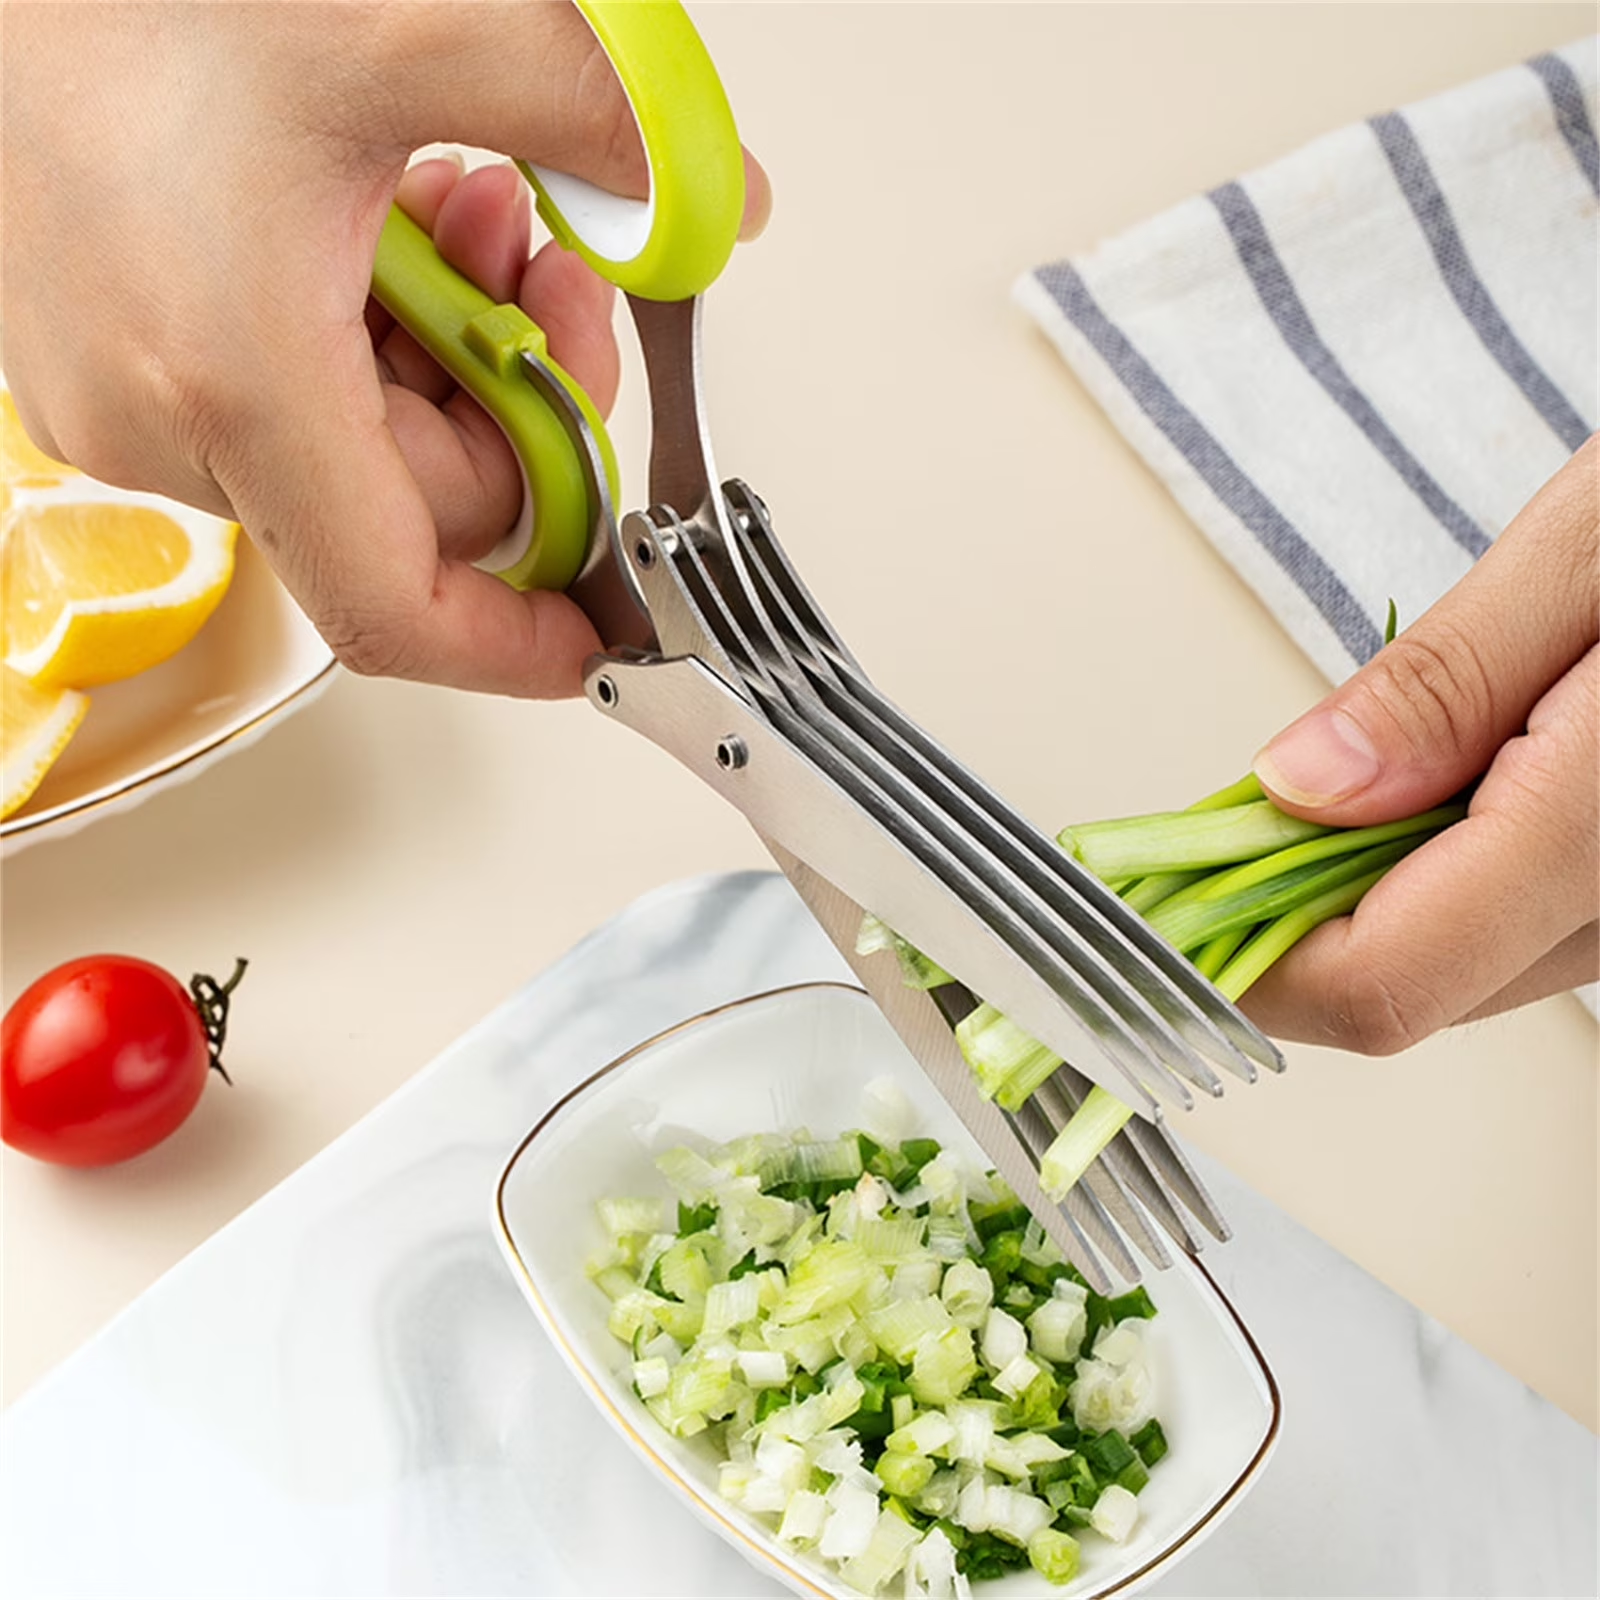
Image source: Web (Bing) / walmart.com (Web image (fair-use with source credit))
How the Cutting Motion Works (Step-by-Step Visual Breakdown)
Now that you know the parts, let's walk through the actual cutting process. This is where the design makes sense in practice. Grab a bunch of parsley and follow along.
Step 1: Position the herb bundle between the blades
Hold the herb bunch in one hand, with the leaves aligned and the stems pointing away from you. Open the scissors fully and slide the blades over the top of the herb bunch, positioning them so the cutting edge sits where you want the cut to land.
The key here is depth. You want the blades to cover the entire width of the herb bunch. If the bunch is wider than the blades, you'll get partial cuts and uneven pieces.
For large bunches, work in smaller sections.
Step 2: The "one-squeeze" chop
Close the handles with a firm, even squeeze. Don't jerk or rock the scissors. A steady press pushes all the blades through the herb matter in a single motion.
The blades slice through the leaves, and the cut pieces fall between the blades or onto the cutting surface below.
This is where the physics of the design kicks in. Because the blades are parallel and close together, they create a shearing effect. The herb is held in place by the surrounding blades, so it can't shift or slide sideways.
Each blade slices cleanly through its section.
Step 3: How the blade gap determines cut width
The space between each pair of blades directly controls the size of your cut. Here's the simple math:
| Blade Gap | Resulting Cut Size | Best For |
|---|---|---|
| 3 mm | Fine mince | Garnishes, sauces, fine chiffonade |
| 4-5 mm | Medium chop | General cooking, salads, toppings |
| 6+ mm | Coarse chop | Soups, stews, rustic dishes |
When the blades come down, every section of the herb that sits within a gap stays in place. The blade cuts at the edges of that gap. So a 4 mm gap produces roughly 4 mm wide pieces.
It's not perfectly uniform, but it's far more consistent than hand-chopping with a knife.
Step 4: The cupping-and-scraping pickup
After the cut, flip the scissors over so the blade stack faces up. The chopped herbs sit in the concave curve between the handles and the blade tips. Use your thumb or a spatula to scrape them into your bowl or pan.
This step is the reason herb scissors feel efficient. You don't need a cutting board, a bench scraper, or a knife. The tool holds what it cuts, and you transfer it in one motion.
Anatomy of a Good Cut: Why Blade Spacing Matters Most
The single biggest factor in how well herb scissors work is blade spacing. It's not the number of blades, and it's not the brand. It's the gap between the cutting edges.
Wide gaps vs. tight gaps
A wide gap means the blades are farther apart. This produces larger pieces, but it also means less resistance during the cut. Wide-gap models are easier to squeeze and less likely to clog on dense herbs like chives.
Tight gaps produce a fine mince. That's ideal for garnishes or sauces. But they also pack more herb matter into a smaller space, which means more friction.
You'll need a firmer squeeze, and you'll deal with more clogging.
Manufacturer specifications indicate that most general-purpose models land in the 4 to 5 mm range. That's the sweet spot: fine enough for most cooking applications, but open enough to avoid constant jamming.
Straight blades vs. curved blades
This is a subtle design choice that affects performance more than most people realize.
- Straight blades cut perpendicular to the handle. They're better for slicing through herbs that sit flat on a cutting board.
- Curved blades have a slight arc. They're better for "scooping" herbs that you hold in your hand, because the curve matches the natural shape of a herb bundle.
Curved blades also tend to work better for the cupping technique, since the arc helps hold the chopped herb pieces in place.
Slicing vs. crushing (and why it matters for flavor)
Here's the chemistry part, and it matters more than you'd think. When you crush a herb leaf, you rupture the cell walls. That releases enzymes that cause oxidation.
Oxidation is what turns fresh basil dark and dulls the flavor of cilantro.
A sharp blade slices cleanly through cell walls, minimizing the rupture. A dull blade, or a blade that's misaligned due to a loose pivot, crushes instead of slicing. The result is darker, bitterer herbs that lose their bright flavor faster.
U.S. Department of Agriculture research on post-harvest handling of fresh herbs confirms that minimizing cellular damage is key to preserving color and aroma after cutting. Sharp, clean cuts beat crushed edges every time.
That's why blade condition matters just as much as blade count.