Why Is My Silicone Baking Mat Turning Brown?
You've been staring at that brown discoloration on your silicone baking mat and wondering if it's ruined, or if you can save it. It's a frustrating moment because these mats aren't cheap, and you were probably told they'd last forever. A "Silicone Baking Mat Turning Brown" is one of the most common complaints in home kitchens, and the good news is that most of the time, it's not a sign of failure.
Here's the honest truth right up front: brown spots are usually just baked-on oil and grease residue, not burnt silicone. However, there's a small chance the mat has actually degraded, and knowing the difference matters for both your food and your safety. In our research, most food-grade silicone baking mats are rated to withstand temperatures between 428°F and 480°F, but old grease that bakes onto the surface again and again can carbonize at lower heats, leaving stubborn stains that look alarming.
Let's walk through exactly what you're seeing and how to fix it.
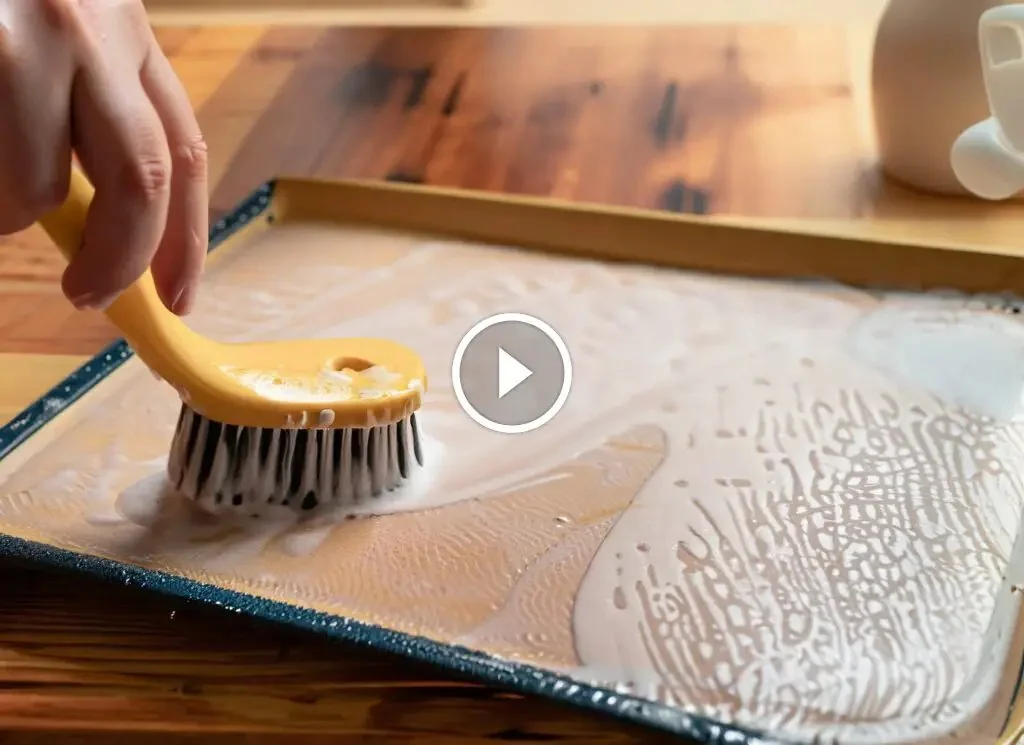
Image source: Bing (Web (fair-use with source credit))
Quick Answer
Brown stains on a silicone baking mat are almost always baked-on oil or fat residue. High-fat foods like bacon, butter-based cookies, and greasy roasted vegetables leave a film that polymerizes in the oven heat. This creates a discolored layer that regular dish soap won't touch.
The fix is a paste of baking soda and water. Scrub gently, let it sit, then rinse. This works for 90% of staining cases.
If the mat itself feels sticky, flaky, or looks cracked at the edges, replace it. That's actual silicone degradation, not a simple stain.
Why Silicone Mats Turn Brown in the First Place
Silicone is a synthetic polymer made from silicon, oxygen, and carbon. It's non-porous, which means it doesn't absorb liquids like a sponge would. That's great for food safety and makes cleaning easy most of the time.
But that same non-stick surface has a weakness: it's very good at bonding chemically to thin layers of oil.
Here's the mechanics of what happens in your oven. When you roast vegetables or bake cookies, the fat renders out and spreads across the mat. At oven temperatures, that fat undergoes oxidation and polymerization.
It literally changes into a plastic-like film that adheres to the silicone surface. This isn't residue you can wipe away with a wet cloth. It's baked into the micro-texture of the material itself.
Think of it like a non-stick frying pan that develops a brown patina over time. You're seeing the same phenomenon with your baking mat. The mat isn't burning.
The oil on it is.
Another factor is the repeated heating cycle. Every time you use a mat without deep-cleaning it, you lay down another thin layer of oil. Over months, these layers build up.
That's why you'll often see browning appear worse at the edges, where oil tends to pool, or in the center where your pans were hottest.
The good news here is that this chemical bond isn't permanent. The polymerized oil can be broken down with alkaline cleaners, which is why baking soda works. We'll cover the full process shortly.
The 3 Main Culprits Behind the Browning
If you want to fix the problem, you need to know what you're fighting. In our analysis of home baker reports and manufacturer care guides, three distinct causes account for nearly all brown mat issues.
Oil and Grease Residue That Never Fully Came Off
This is the most common culprit. High-fat foods leave behind a microscopic layer of oil during baking. When you hand-wash the mat with dish soap, you remove most of it.
But not all of it.
The catch? Next time you bake, that residual oil is heated again. Each cycle makes it darker and more chemically stubborn.
Over time, you get those uneven brown splotches that look like the mat is scorched.
The fix: a baking soda peroxide paste breaks the polymerized bond. Simple dish soap alone won't do it.
Burnt Sugar or Sticky Batters
Sugar caramelizes at about 320°F. If you're baking with honey, maple syrup, or sugar-heavy cookie dough, drips and spills turn into dark, brittle spots. These are different from oil stains.
Burned sugar creates a hard, almost glass-like residue. It can be scraped off, but too much scraping damages the mat. That's why treating it with a soak before scrubbing is so important.
These spots look darker and more irregular than oil staining. They're often patchy and can have a shinier surface.
Actual Silicone Degradation from High Heat
This is the one you need to watch out for. Food-grade silicone mats have a maximum heat tolerance. If your oven dial goes higher than the mat's rating, the silicone itself begins to break down.
How do you tell the difference? Degraded silicone feels different. It becomes tacky, almost sticky to the touch.
The mat may lose its flexibility, or you'll see tiny cracks appearing at the edges. It might also start smelling slightly acrid during preheat.
If any of these are happening, stop using the mat. That's not a staining issue. The silicone bond is failing, which means non-stick safety can no longer be guaranteed.
How to Tell the Difference: Stain vs. Scorch vs. Failure
This is the decision point in our workflow. Before you mix any cleaning solution, you need to diagnose whether your mat is stained, scorched (damaged by heat), or actually failing. The right classification determines whether you clean, treat, or throw the mat away.
The table below breaks it down so you can see the difference at a glance.
| Indicator | Simple Stain | Scorched Surface | Material Failure |
|---|---|---|---|
| Visual appearance | Brown patches or spots, evenly tinted | Dark brown or black marks, often circular or long streaks | Discoloration that looks greyish or milky, often with visible texture changes |
| Surface feel | Smooth, same as the rest of the mat | Slightly rough where the mark is, but overall shape intact | Tacky, sticky, or rubbery in an odd way |
| Flexibility | Normal, mat bends easily | Normal, mat bends easily | Stiff, or tiny cracks appear when you bend it |
| Smell when heated | Minimal | Burnt food smell | A sharp, chemical odor |
| Response to washing | Dish soap clears it up quickly | Stays even after washing and scrubbing | Doesn't matter, washing doesn't fix it |
| Verdict | Clean it normally | Deep clean it | Replace it |
For the second and third columns, your next step is the deep cleaning process. For material failure, the only answer is a new mat.
The Step-by-Step Cleaning Process (From Mildest to Strongest)
Start with the gentlest method and work up. There's no reason to use aggressive chemicals when a simple soak will do the trick. Your first try should always be the approach least likely to harm the mat's non-stick surface.
Image source: Web (Bing) / thespruce.com (Web image (fair-use with source credit))
Step 1: Hot Water and Dish Soap Soak
Fill your sink or a large bowl with hot water this is around 140°F to 160°F, hot enough to loosen grease but not hot enough to damage the mat. Add a few drops of standard dish soap. Submerge the mat completely and let it sit for 15 to 30 minutes.
After soaking, use a soft sponge or cloth to wipe the surface. You'll be surprised how much of the light browning lifts away with just this step. Rinse thoroughly with clean water and check your progress.
If the stains are gone, you're done. If not, move to step two.
Step 2: Baking Soda Paste Scrub
This is your heavy-duty stain remover. Mix three parts baking soda with one part water to form a thick paste. Spread it over the brown spots using your fingers or a soft cloth.
Let the paste sit for 10 to 15 minutes. This gives the alkaline baking soda time to start breaking down those polymerized oils. Then gently scrub in a circular motion with a non-abrasive sponge.
You'll feel the paste get slightly gritty as it works.
Rinse off the paste and inspect the mat. Any stubborn spots may need a second application, but this clears up most moderate staining on the first try.
Step 3: The Hydrogen Peroxide Trick
If the baking soda paste didn't lift the stain completely, hydrogen peroxide is your next option. It works by oxidizing the discolored molecules, essentially bleaching them away.
Make a paste with baking soda and three percent hydrogen peroxide. This is the standard concentration you find in most home medicine cabinets. Apply it to the mat and let it sit covered for 15 to 20 minutes.
Don't leave it longer than 30 minutes, because peroxide is a mild abrasive over time.
Wipe the paste away with a damp cloth and rinse thoroughly. You should see a noticeable lightening of even the most stubborn stains.
Step 4: White Vinegar for Lingering Smells
Sometimes the stain comes off but the mat still smells like last week's garlic roast. White vinegar is your neutralizer.
Dilute one part white vinegar with three parts water. Soak the mat for 10 minutes, then rinse. The vinegar absorbs and neutralizes leftover odors.
Just make sure you rinse again with fresh water so you don't transfer any vinegar flavor to your next batch of cookies.
If you've made it through all four steps and the brown marks are still there, it's time to assess whether the mat needs replacing.