Why Food Sticks to Silicone Mats (And Fix It)
If you've ever pulled a tray of cookies off a silicone baking mat only to find half of them stuck, you know the frustration. Food sticks to silicone baking mat surfaces for a few very specific reasons, and once you understand them, the fix is usually simple.
Silicone mats are rated for temperatures up to 450°F to 500°F per manufacturer specifications, and they're marketed as the ultimate reusable non-stick surface. But that non-stick claim comes with caveats. Low-fat batters, sugary glazes, and worn-out mats all behave differently, and knowing which category your problem falls into is the key to solving it.
Let's walk through the diagnostic process step by step.
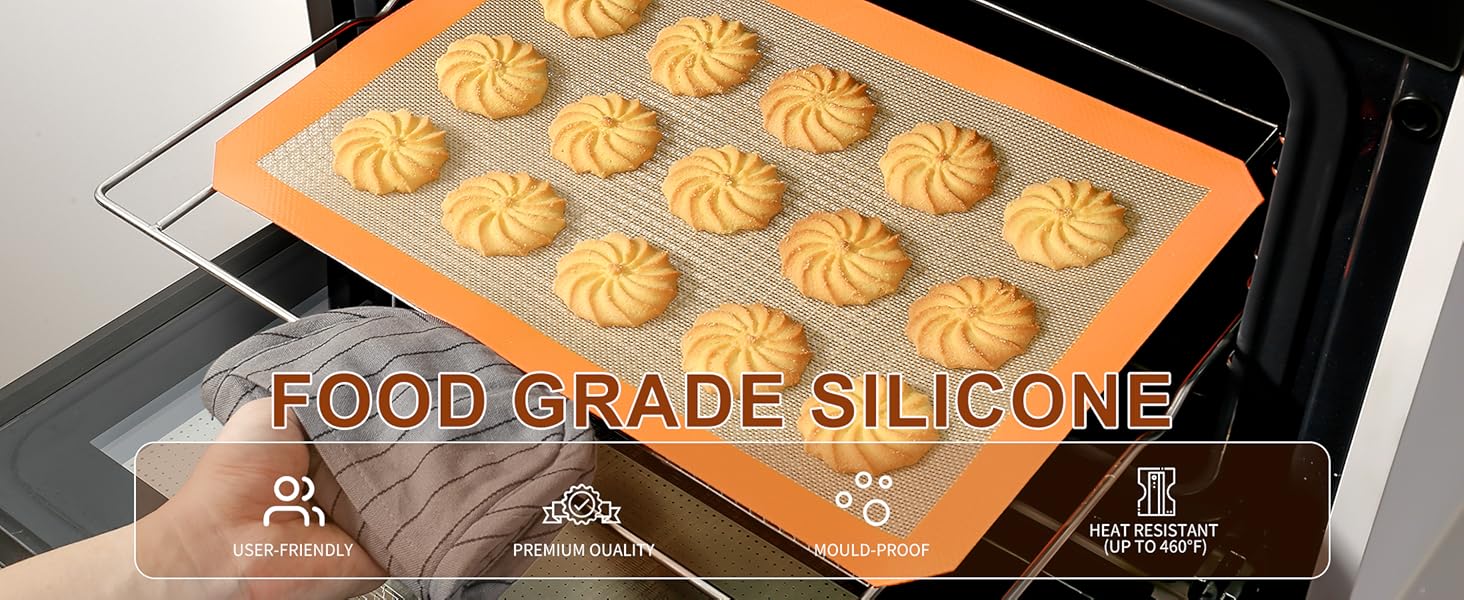
Image source: Bing (Web (fair-use with source credit))
Quick Answer
Food sticks to silicone baking mats when the recipe lacks enough fat or sugar to release cleanly. It also happens when grease residue builds up on the mat's surface over time. Wash the mat thoroughly with hot water and mild soap.
For lean batters, add a light brush of oil or switch to parchment paper. If sticking persists, the mat may be worn out and needs replacing.
Why Your Food Keeps Sticking to Silicone Baking Mats
The short version is that silicone mats aren't truly non-stick in every scenario. They're non-stick for most things, most of the time, but the chemistry of what you're baking matters more than the mat itself.
Here's the thing about silicone: it's hydrophobic, meaning it repels water. That's why egg whites and meringues slide right off a fresh mat. But fats and sugars behave differently.
When sugar caramelizes, it bonds to almost anything it touches, including silicone. And when a batter is very low in fat, there's nothing between the food and the mat to create that release layer.
The structure of the mat matters too. Most silicone baking mats have a fiberglass mesh core sandwiched between two layers of food-grade silicone. The surface feels smooth, but at a microscopic level, it has texture.
Over time, that texture fills with baked-on residue, tiny scratches, and grease that just won't come off with a regular wipe.
The Role of Fat Content
Fat is your best friend when it comes to release. Cookies with a high butter content rarely stick. So do croissants, pastries, and anything with a good amount of oil or butter in the dough.
The fat migrates to the surface during baking and creates a barrier between the food and the mat.
Lean batters are a different story. Think about things like meringues, macarons, or low-fat cookies. These have very little fat to help with release.
The proteins and sugars in these batters bond directly to the silicone surface, especially if the mat isn't perfectly clean.
The Sugar Problem
Sugar is sticky. It's that simple. When sugar melts and caramelizes at high temperatures, it becomes a glass-like substance that adheres to nearly anything.
This is why candied nuts, caramel-drizzled treats, and glazed pastries are the most common offenders when food sticks to silicone baking mats.
If you're baking anything with a sugary glaze or filling that bubbles out during baking, expect some sticking. The sugar creates a bond that even a fresh mat can't resist.
The Quick Answer: What's Actually Going Wrong
Let's cut through the confusion. There are really only three reasons food sticks to a silicone mat:
- The mat is dirty. Grease residue builds up over time and creates a sticky film.
- The recipe is too lean or too sugary. Neither extreme releases cleanly.
- The mat is degraded. Scratches, warping, or age have destroyed the surface.
Here's how to tell which one is your problem. If the mat is less than a year old and looks clean, it's probably the recipe. If the mat is older, has visible scratches, or feels slightly tacky even after washing, it's the mat.
The good news is that two of these three problems are fixable without spending any money. The bad news is that one of them means buying a new mat.
The Decision Tree: Diagnose Your Specific Sticking Problem
This is where it gets practical. Work through these branches one at a time.
Branch 1: Sticking Happens with Low-Fat or Lean Batters
If you're making meringues, macarons, angel food cake, or low-fat cookies, then the recipe itself is the culprit.
Low-fat batters lack the oil or butter that creates a release barrier. The proteins in eggs bond directly to the silicone surface during baking. This is especially true with meringues, which are essentially whipped egg whites and sugar.
Fix: Brush a very thin layer of neutral oil on the mat before baking. You only need a whisper of it, just enough to create a barrier. A pastry brush works perfectly.
If you're making macarons, this will make the bottoms slightly less smooth, but it will prevent sticking. Alternatively, switch to parchment paper for lean batters. Parchment has a natural release that works better for these recipes.
Branch 2: Sticking Happens with Sugary or Sticky Foods
If the food that sticks is glazed, candied, or has a sugary topping, then the sugar is the problem.
Sugar melts and re-solidifies during baking. When that happens, it bonds to silicone just like it bonds to your teeth. This is not a defect in your mat.
It's physics.
Fix: Let the food cool completely before trying to remove it. Sugar-based foods release much better when they're fully set. For things like candied nuts or caramel-glazed pastries, consider using parchment paper instead.
The sugar will still stick a little, but parchment tears away more easily than silicone flexes. You can also bake these items at a slightly lower temperature for longer, which reduces caramelization on the mat surface.
Branch 3: Sticking Happens Even with High-Fat Recipes
If your butter cookies, pizza dough, or roasted vegetables are sticking, then the mat itself is the problem.
High-fat foods should release easily. If they don't, the mat is either dirty or degraded.
Fix: First, give the mat a deep clean (see the maintenance section below). If that doesn't solve it, the mat has reached the end of its life. Check for scratches, creases, or a tacky feel.
If any of these are present, replace the mat. Most silicone mats last two to three years with regular use. As of 2026, many manufacturers are producing mats with improved release surfaces, but even the best ones wear out.
Branch 4: Sticking Gets Worse Over Time
If the mat used to work perfectly and now everything sticks, then it's a maintenance or aging issue.
Silicone is porous at a microscopic level. Over time, grease and food residue fill those pores. Washing with soap and water removes surface debris, but it doesn't always get into the microscopic pores.
Fix: Try the baking soda paste method. Mix three parts baking soda with one part water to create a paste. Rub it into the mat's surface, let it sit for fifteen minutes, then rinse with hot water.
This lifts the embedded grease and restores some of the original surface. If this doesn't work, the mat is done.
The Science of Silicone: Why It's Non-Stick (and When It Isn't)
Silicone is a synthetic polymer made from silicon, oxygen, carbon, and hydrogen. Its non-stick properties come from having a very low surface energy, which means other materials don't easily bond to it. This is the same principle behind PTFE (Teflon) coatings.
But silicone has a different chemical structure than PTFE. PTFE is extremely inert, which is why almost nothing sticks to it. Silicone is more reactive, particularly at high temperatures.
That's why it works for most foods but fails with sticky, sugary, or protein-heavy items.
The other factor is heat. Silicone is a poor conductor of heat. It acts as an insulator between your baking sheet and the food.
This means food takes longer to brown on a silicone mat than on a metal pan. It also means the mat surface stays slightly cooler than the pan itself, which can affect how sugars and proteins set. For most baked goods, this is fine.
For things that need intense bottom heat, like pizza or flatbreads, it can cause problems.
What the Fiberglass Core Does
Most quality silicone mats have a fiberglass mesh core. This gives the mat structure and prevents it from stretching. It also helps distribute heat more evenly across the surface.
The downside is that if the silicone layer gets scratched or cut, the fiberglass can become exposed. That's a problem for two reasons. First, the fiberglass can absorb food residue, which is impossible to fully clean.
Second, tiny fiberglass particles can break off and contaminate your food. This is why manufacturers strongly advise against cutting food directly on a silicone mat.
The Mistake Most People Make: Cooking Sprays and Oils
Here's something that surprises a lot of home bakers. Using aerosol cooking spray on a silicone mat is actually bad for it.
The propellants and additives in most cooking sprays leave a residue on silicone that builds up over time. That residue becomes sticky and actually makes sticking worse. It also attracts dust and debris, which accelerates the degradation of the surface.
What to use instead: A light brush of neutral oil, applied sparingly. You only need enough to create a thin, barely visible film. Or use a silicone brush to spread a few drops of olive oil or vegetable oil across the surface.
For most recipes, you don't need any oil at all. Only reach for it when you're dealing with very lean or very sugary batters.
How to Fix a Sticky Mat: Step-by-Step Recovery Process
If your mat has lost its non-stick edge but isn't physically damaged, you can often bring it back to life. Here's the recovery process that works best.
Step 1: Wash with Hot Water and Mild Soap
Start with the basics. Use hot water and a mild dish soap. Avoid anything abrasive, including scouring pads and stiff brushes.
These create micro-scratches that hold onto food. Use a soft sponge or your fingers.
Step 2: Baking Soda Paste Treatment
Mix three parts baking soda with one part water to make a thick paste. Spread it across the entire mat surface. Let it sit for fifteen minutes, then rub gently with a soft cloth.
The baking soda is mildly abrasive and lifts embedded grease without scratching the silicone. Rinse thoroughly.
Step 3: Vinegar Rinse
Fill your sink with hot water and add half a cup of white vinegar. Soak the mat for ten minutes. The vinegar cuts through grease and neutralizes odors.
Rinse again with hot water.
Step 4: Air Dry Completely
Lay the mat flat or hang it to dry thoroughly. Don't put it away wet. Moisture trapped between the mat and your pan can lead to mildew, and prolonged moisture can affect the silicone's structure.
Step 5: Test Before Your Next Full Batch
Once the mat is clean and dry, test it with a single cookie or a small portion of whatever you're baking. This tells you whether the mat is genuinely recovered or whether you need to replace it.
Image source: Web (Bing) / pinterest.com (Web image (fair-use with source credit))
If sticking persists after this entire process, the mat is done. No amount of cleaning will restore a surface that has lost its non-stick properties. For reference, the FDA has guidelines on food-contact silicone materials, and most reputable brands manufacture their mats to meet these standards.
You can read more about FDA food-contact substance regulations if you want to understand what your mat is actually made of.
Cleaning and Maintenance: What Restores the Non-Stick Surface
Regular cleaning is the single most important factor in keeping a silicone mat non-stick. Most people wipe the mat with a damp cloth and call it done. That's not enough.
The right routine is simple. Wash the mat with hot water and mild dish soap after every single use. A soft sponge works fine.
Avoid anything abrasive, including scouring pads, steel wool, or stiff brushes. These create micro-scratches that trap food particles and make sticking worse over time.
For a deeper clean once a month, use the baking soda paste method. Mix three parts baking soda with one part water. Rub it into the mat's surface, let it sit for fifteen minutes, then rinse thoroughly.
This lifts the embedded grease that regular washing leaves behind.
What to Avoid
Cooking spray is the biggest offender. The propellants and additives in aerosol sprays leave a sticky film on silicone that builds up each time. That film attracts dust and debris, and it eventually becomes the reason your food sticks.
Dishwashers are also problematic. The harsh detergents and high heat can degrade the silicone surface over time. Most manufacturers recommend hand washing, and it's worth following their advice if you want the mat to last.
Never cut directly on the mat. A knife blade will scratch the silicone, exposing the fiberglass mesh core. Those scratches become permanent sticking points, and the fiberglass can absorb food residue that's impossible to remove.
When to Replace: Signs Your Mat Is Done
No silicone mat lasts forever. With regular use and proper care, most mats last between two and three years. As of 2026, premium brands advertise longer lifespans, but aggregate buyer feedback suggests three years is a realistic ceiling for heavy use.
Here are the signs that it's time to replace your mat:
- Visible scratches or cuts. Even tiny ones compromise the surface and give food a place to bond.
- A tacky or sticky feel. After a thorough cleaning, the surface should feel smooth and slightly grippy. If it feels sticky, the silicone has degraded.
- Warping or creasing. A mat that no longer lies flat won't sit evenly on your baking sheet, which leads to uneven baking and sticking.
- Discoloration that doesn't wash out. Some staining is normal, especially from turmeric or tomato-based foods. But widespread discoloration often signals that the silicone is breaking down.
The Cost of Keeping a Worn Mat
A cheap replacement mat costs around ten to fifteen dollars. A premium one runs between twenty and thirty dollars. That's a small price compared to wasting ingredients on batches that stick and ruin.
There's also the safety angle. When silicone degrades, it can start to break down at high temperatures. That's not an emergency, but it's not ideal.
The FDA has established guidelines for food-contact silicone, and most reputable brands meet those standards. Worn mats don't necessarily become unsafe, but they do become less functional.
Parchment Paper vs. Silicone Mat: When Switching Makes Sense
Both parchment paper and silicone mats have their place in a kitchen. The right choice depends on what you're baking.
| Scenario | Silicone Mat | Parchment Paper |
|---|---|---|
| High-fat cookies | Best | Works fine |
| Meringues and macarons | Needs oil | Best |
| Sugary glazes and caramel | Sticks | Better release |
| Roasted vegetables | Great | Works fine |
| Pizza or flatbread | Poor browning | Crisper bottom |
| Cost per use | Pennies | About 10 cents per sheet |
| Lifespan | 2-3 years | Single use |
The biggest advantage of parchment is that it's disposable. Sticky situations become irrelevant because you just throw it away. No cleaning, no degradation, no mystery sticking.
Silicone wins on sustainability and cost over time. A single mat replaces hundreds of sheets of parchment. But it only works well when you match it to the right recipes.
A Practical Rule of Thumb
Use parchment for anything with a sugary or sticky element. That includes glazed pastries, candied nuts, and meringues. Use silicone for everything else: cookies, roasted vegetables, breads, and reheating leftovers.
If you want the best of both worlds, keep a roll of parchment in the drawer and one silicone mat on the rack. You'll reach for each one about half the time.
Quick Reference Guide: Fixes by Food Type
Here's a quick cheat sheet for the most common sticking scenarios.
Cookies (high-fat, like chocolate chip). No oil needed. Bake, cool for five minutes, then lift with a spatula. If they stick, deep clean the mat.
Cookies (low-fat, like biscotti). Brush the mat with a whisper of neutral oil before baking. Or switch to parchment.
Meringues and macarons. These are the hardest cases. Let them cool completely before attempting removal. Cold meringues release far better than warm ones.
If they still stick, brush the mat with oil and consider lowering your bake temperature slightly.
Roasted vegetables. A light oil toss on the vegetables themselves is enough. The mat should not need any extra oil.
Bread and pizza dough. These rarely stick. If they do, the dough may be too wet or the mat may need cleaning.
Candy and caramel. Use parchment. Silicone and molten sugar are a bad combination. The sugar will bond to the mat and be nearly impossible to remove.
Cheese-topped dishes. Cheese melts and can fuse to silicone. Let the finished dish rest for five to ten minutes before lifting. A wide spatula works better than a thin one.
Frequently Asked Questions
Can I use cooking spray on a silicone baking mat?
No. The additives in aerosol cooking sprays leave a sticky residue that builds up over time. Use a light brush of neutral oil instead if a recipe needs it.
Why do my macarons stick to the silicone mat?
Macarons are low in fat and high in sugar, which is the hardest combination for silicone to release. Let them cool completely, then gently peel the mat away from the shells. If they still stick, brush the mat with a very thin layer of oil before piping.
Is it safe to cut food on a silicone baking mat?
No. Cutting on the mat scratches the silicone and can expose the fiberglass mesh core. Once scratched, the mat loses its non-stick properties and becomes harder to clean.
How long do silicone baking mats usually last?
Most mats last two to three years with regular use and proper hand washing. Heavy use, dishwasher cleaning, or cutting on the surface will shorten that lifespan.
Does baking spray ruin silicone mats?
Yes, over time. The propellants and emulsifiers in baking sprays leave a film that attracts residue and accelerates surface degradation. Skip the spray and use a small amount of oil or nothing at all.
Can I wash a silicone mat in the dishwasher?
Most manufacturers say yes, but it's not ideal. The harsh detergents and high heat break down the silicone faster. Hand washing with hot water and mild soap gives you the best lifespan.
The Bottom Line: Your Simple Rule to Follow
Here's the takeaway, stripped down to one sentence: match the tool to the food. Silicone mats work beautifully for most baked goods, but they fail with lean batters, sugary glazes, and worn surfaces.
If you remember nothing else, remember this sequence. First, deep clean the mat. If it still sticks, brush on a whisper of neutral oil.
If it still sticks, switch to parchment paper. If the mat is scratched, warped, or older than three years, replace it.
That's the whole process. No magic trick, no expensive products, no guesswork. Just the right diagnosis and the right response.
Silicone baking mats are genuinely useful tools. They save money, reduce waste, and make cleanup easier. They just aren't perfect for every job.
Treat them as one option in your kitchen arsenal, not the only one, and you'll never deal with stuck food again.